About Testlum
Getting Started
General Features
Api Testing
Database Testing
Services Testing
Additional Materials
Powered By
Step 1
- Adjust the global and browser configuration according to your needs
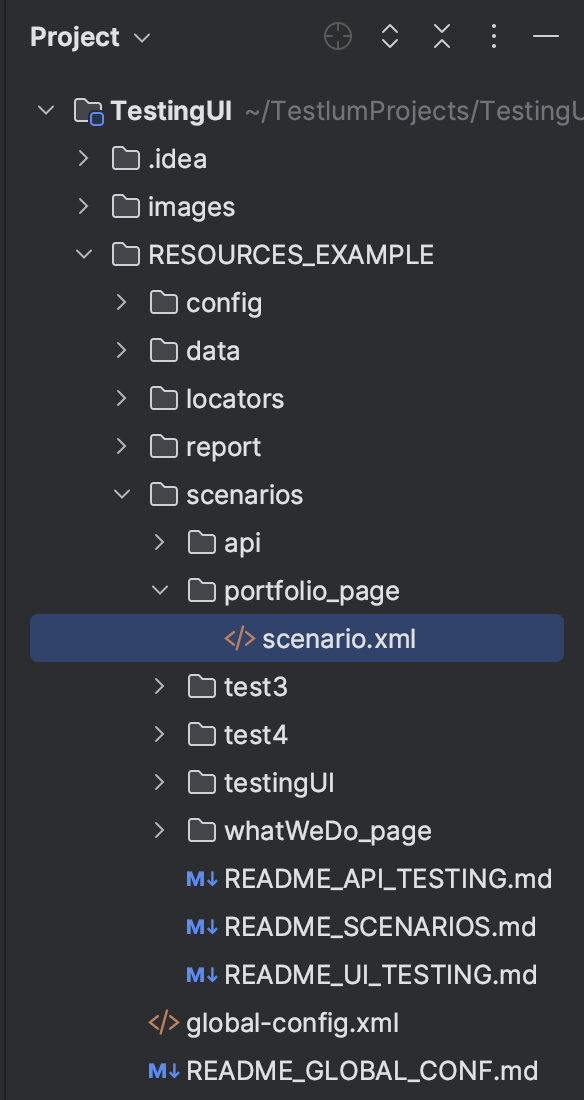
Step 2
- Create a folder (e.g., portfolio_page) with the name of the test scenario inside the
scenariosfolder
- Create a file
scenario.xmlinside the folder
After creating the first scenario.xml you can open the Recorder and record all necessary steps on the web or do it manually. If you choose to create the test script manually, follow the next steps.
Step 3
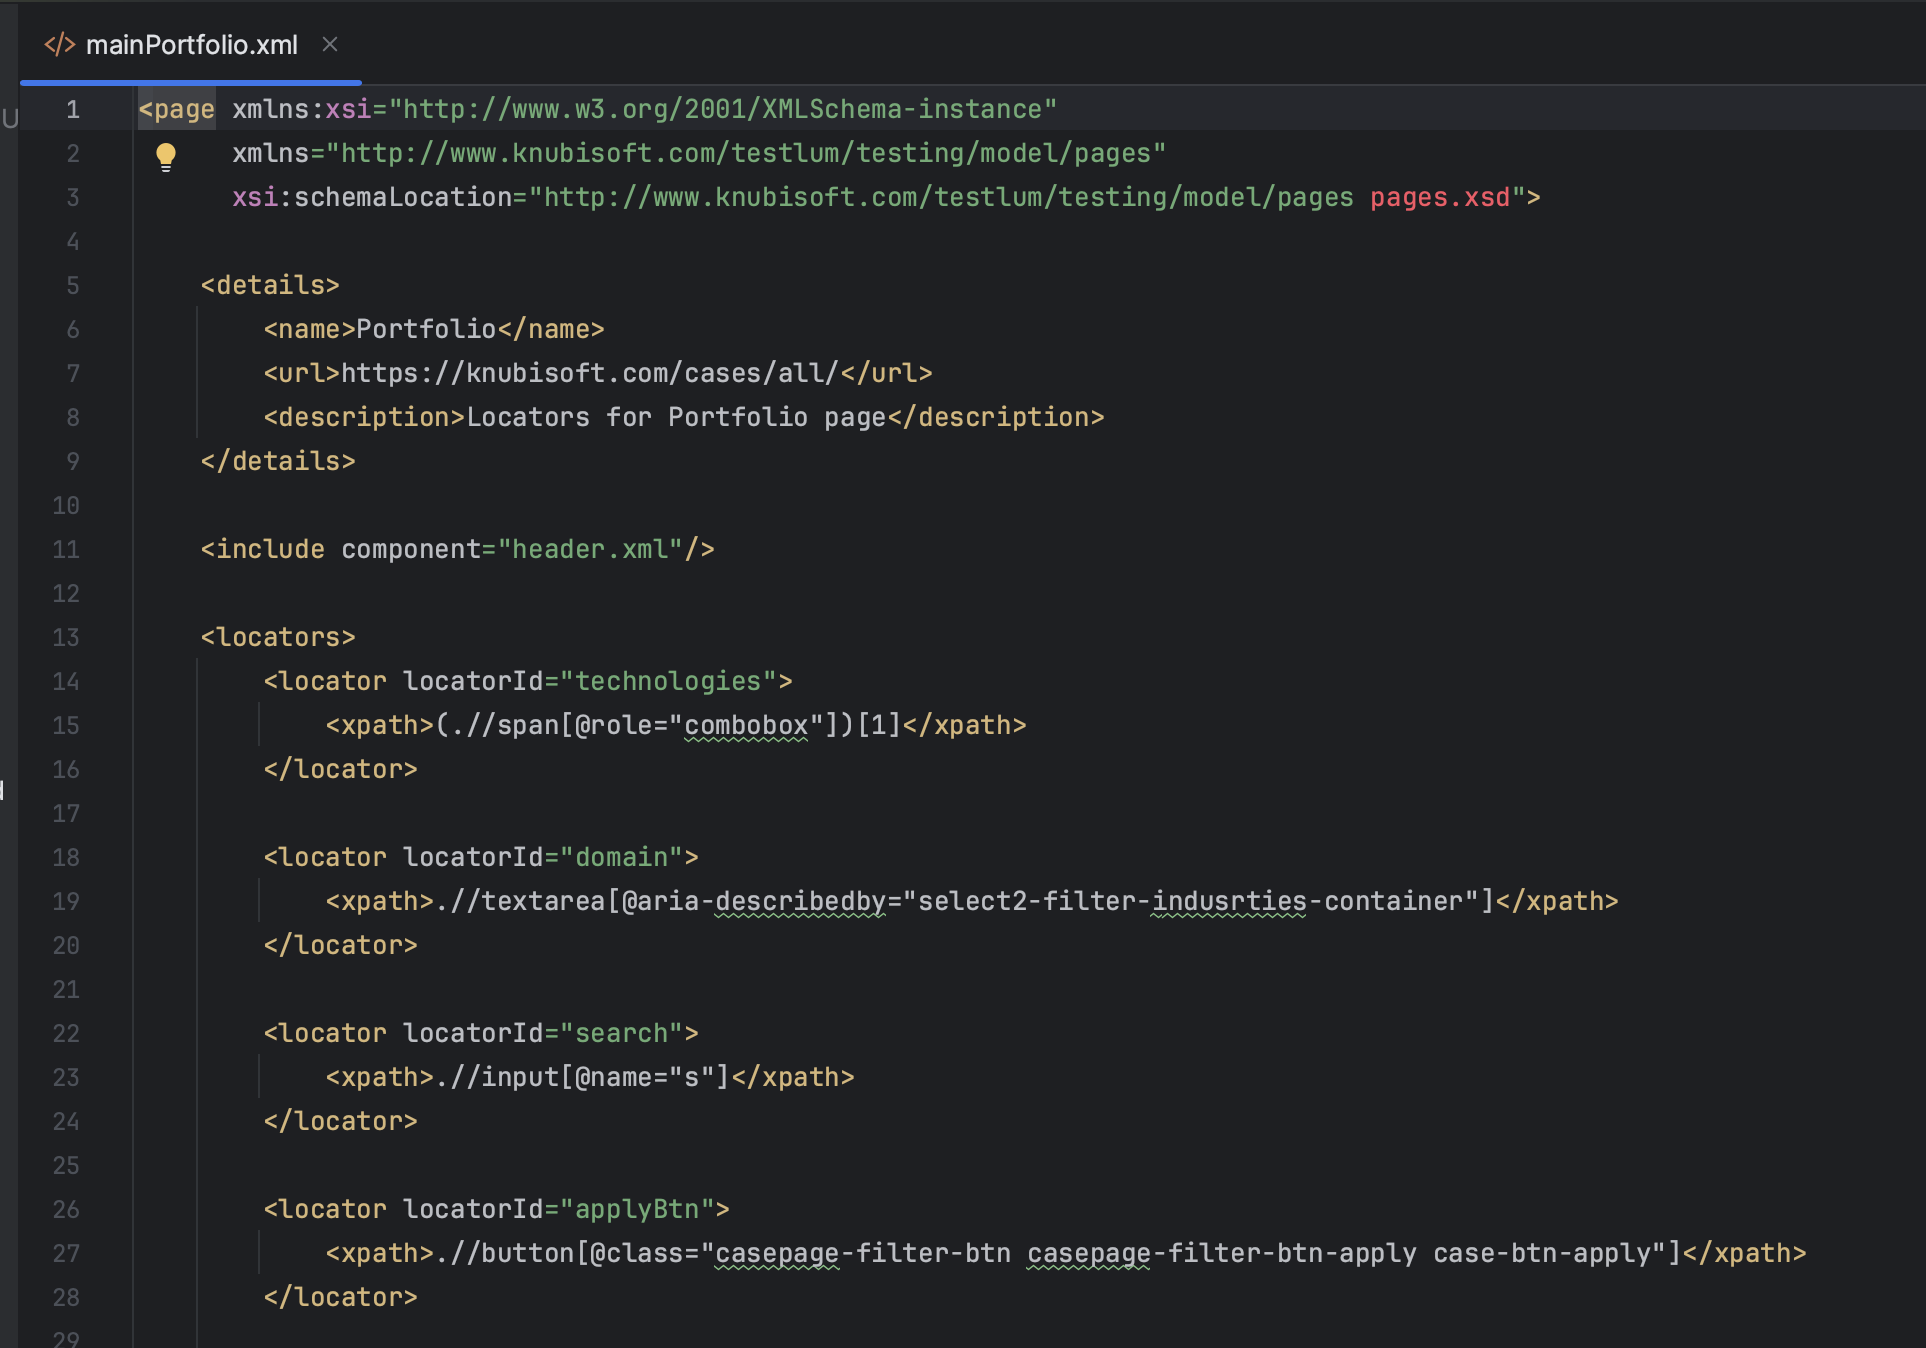
- Open locators folder
- Create a "Locator Pages" file inside the "pages" folder and name it (e.g., mainPortfolio.xml)
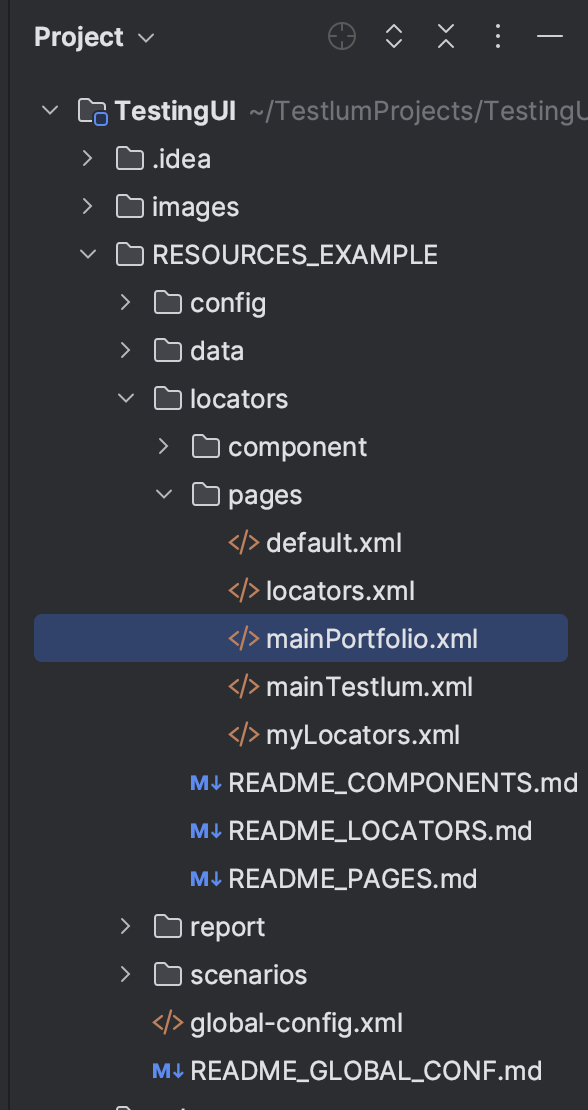
- Fill in all necessary data in <details> tag (name, URL, and description )
- Open the tag
<locators>
- Create the necessary number of locators
Step 4
- Open the created file
scenario.xml
- Fill in the required fields in the <overview> tag
- Fill in the required fields in the <settings> tag
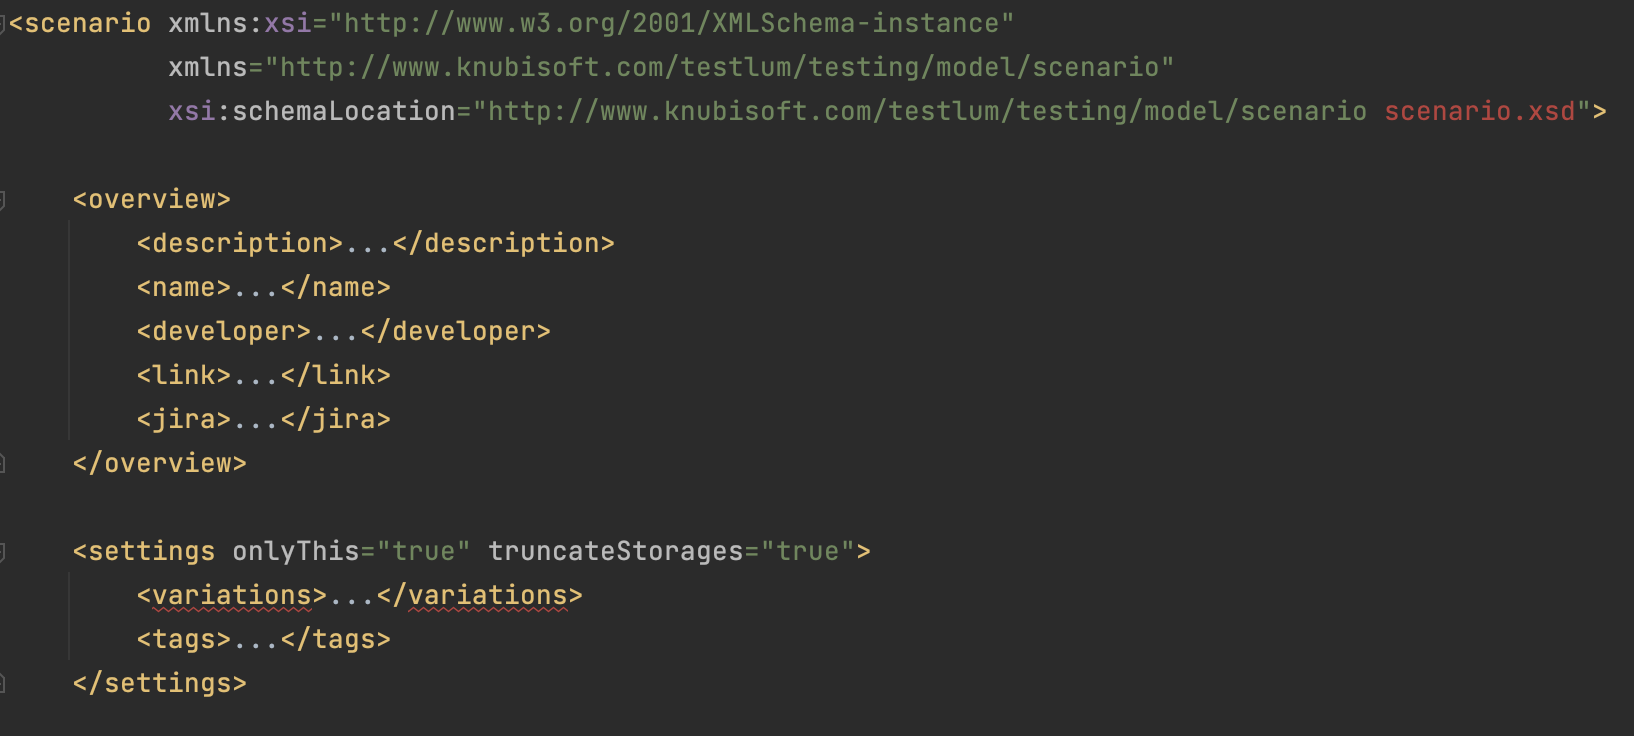
xxxxxxxxxx<description>- A description of the tested scenario (required)
xxxxxxxxxx<name>- A name of the tested scenario (required)
xxxxxxxxxx<developer>- A name of the developer, you can indicate the person who developed the test, or which developer the bug is based on (optional)
xxxxxxxxxx<link>- A link to the site, or documentation, or anything else useful for the test (optional)
xxxxxxxxxx<jira>- A link to a Jira ticket, or anything else useful related to Jira (optional)
xxxxxxxxxx<settings active="" onlyThis="" truncateStorages="">- Set the settings parameters according to the necessary conditions specified in scenario collecting
xxxxxxxxxx<tags>- Set the tag written in
global-config-file.xml( To run the scenario by tags )
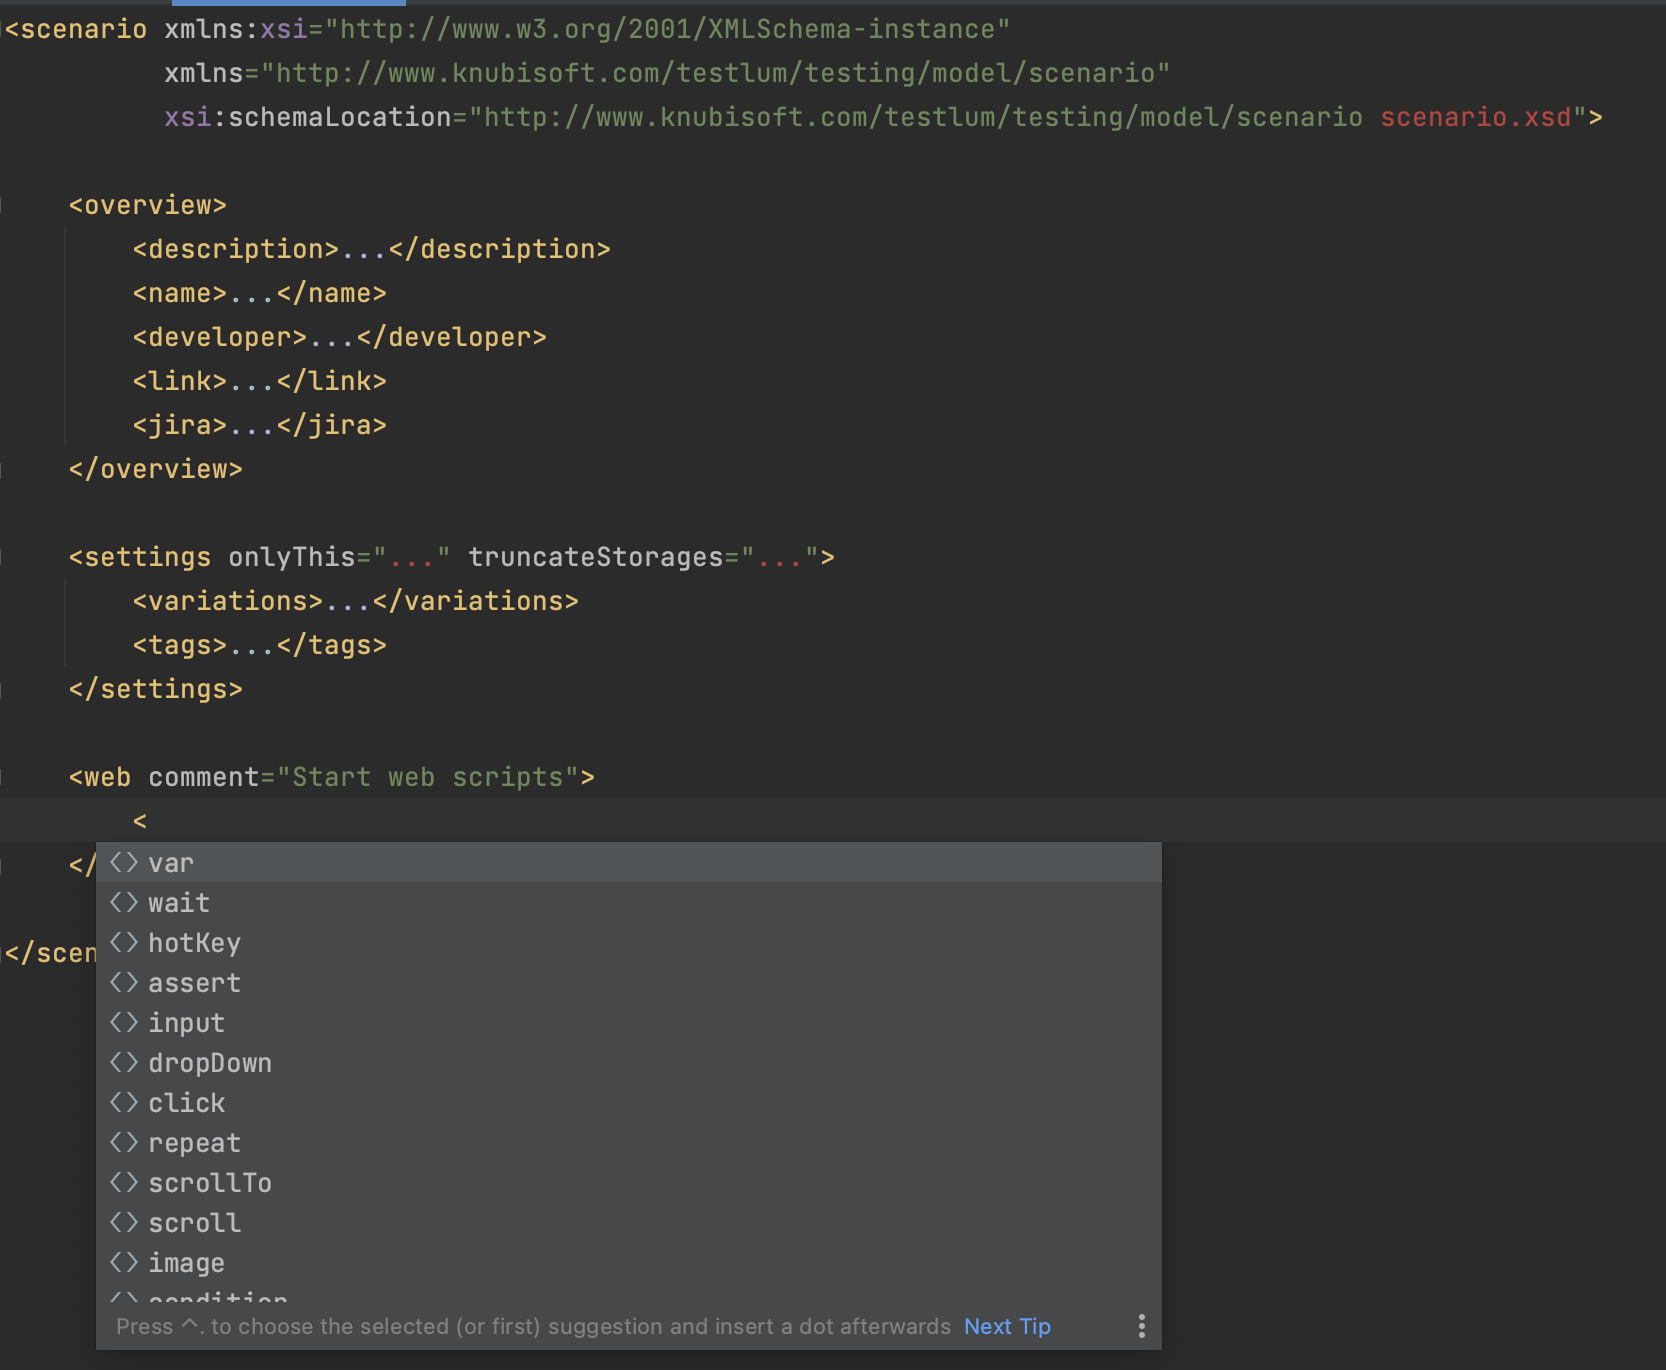
Step 5
- Open up the
WEBcommand inscenario.xmland start writing your tested scenario with the necessary web command
Step 6
- Run Testlum