The Recorder is integrated into Testlum IDE functionality, which allows users to create test scenarios and collect locators by recording user actions on the site. The purpose is to simplify and speed up the tester's work in collecting locators and creating scenarios.
Web commands that are recorded by the Recorder:
- Click
- Input with value
- Clear
- Drop-Down Drop-down One value with by-text + value attributes
- Hover (after 1 sec of pausing on the element)
- Scroll
- Double click
- Drag and Drop
- Switch to frame
- ScrollTo is being recorded as Scroll
How to work with Recorder
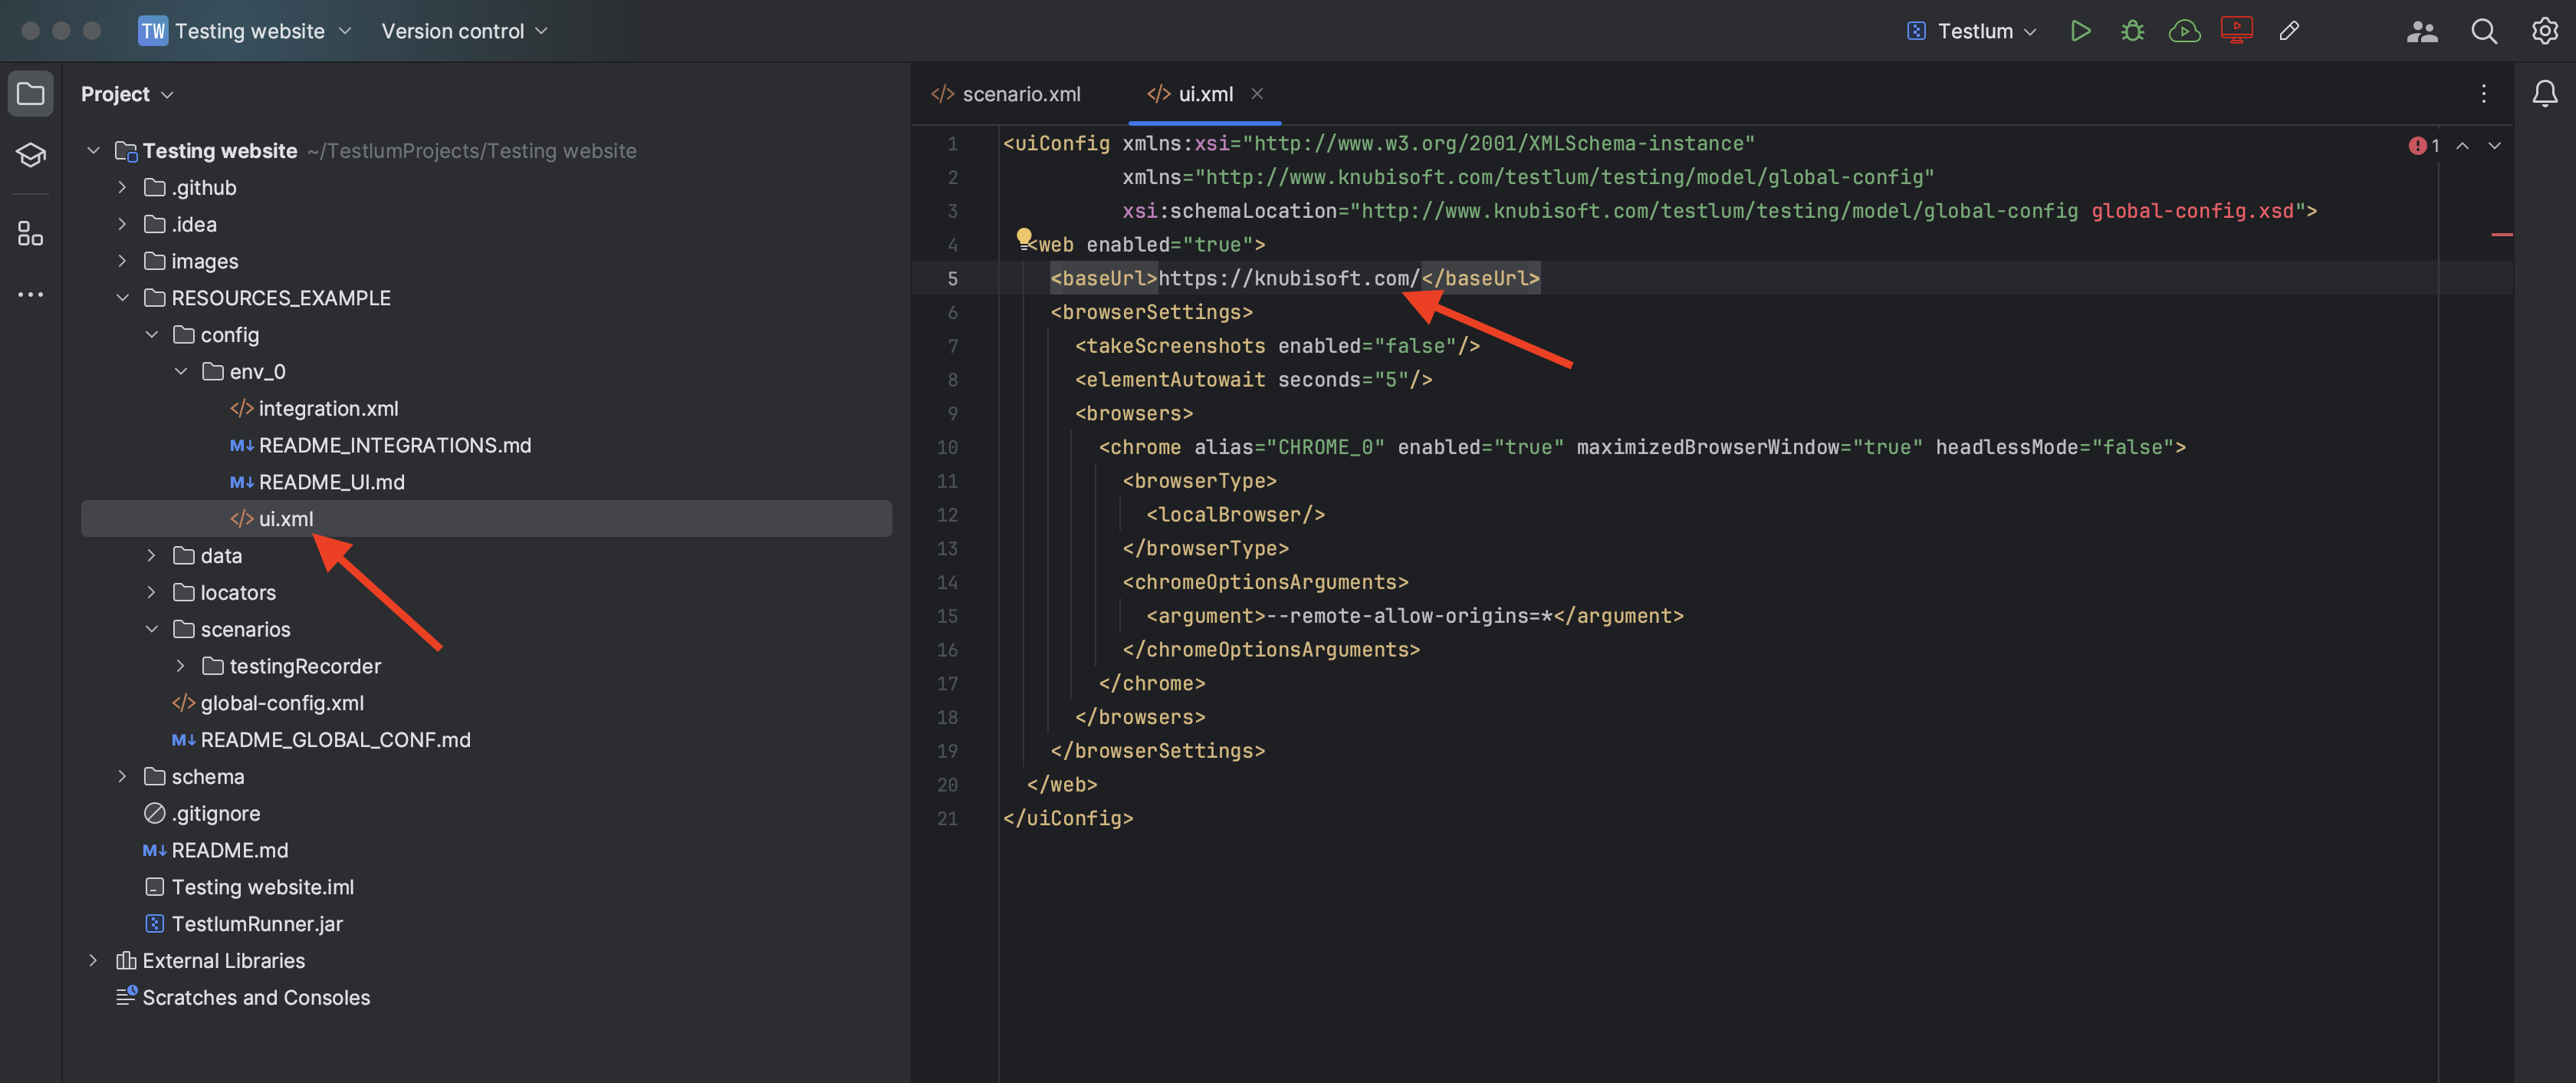
- Set up all necessary configurations in the ui.xml and global-config.xml
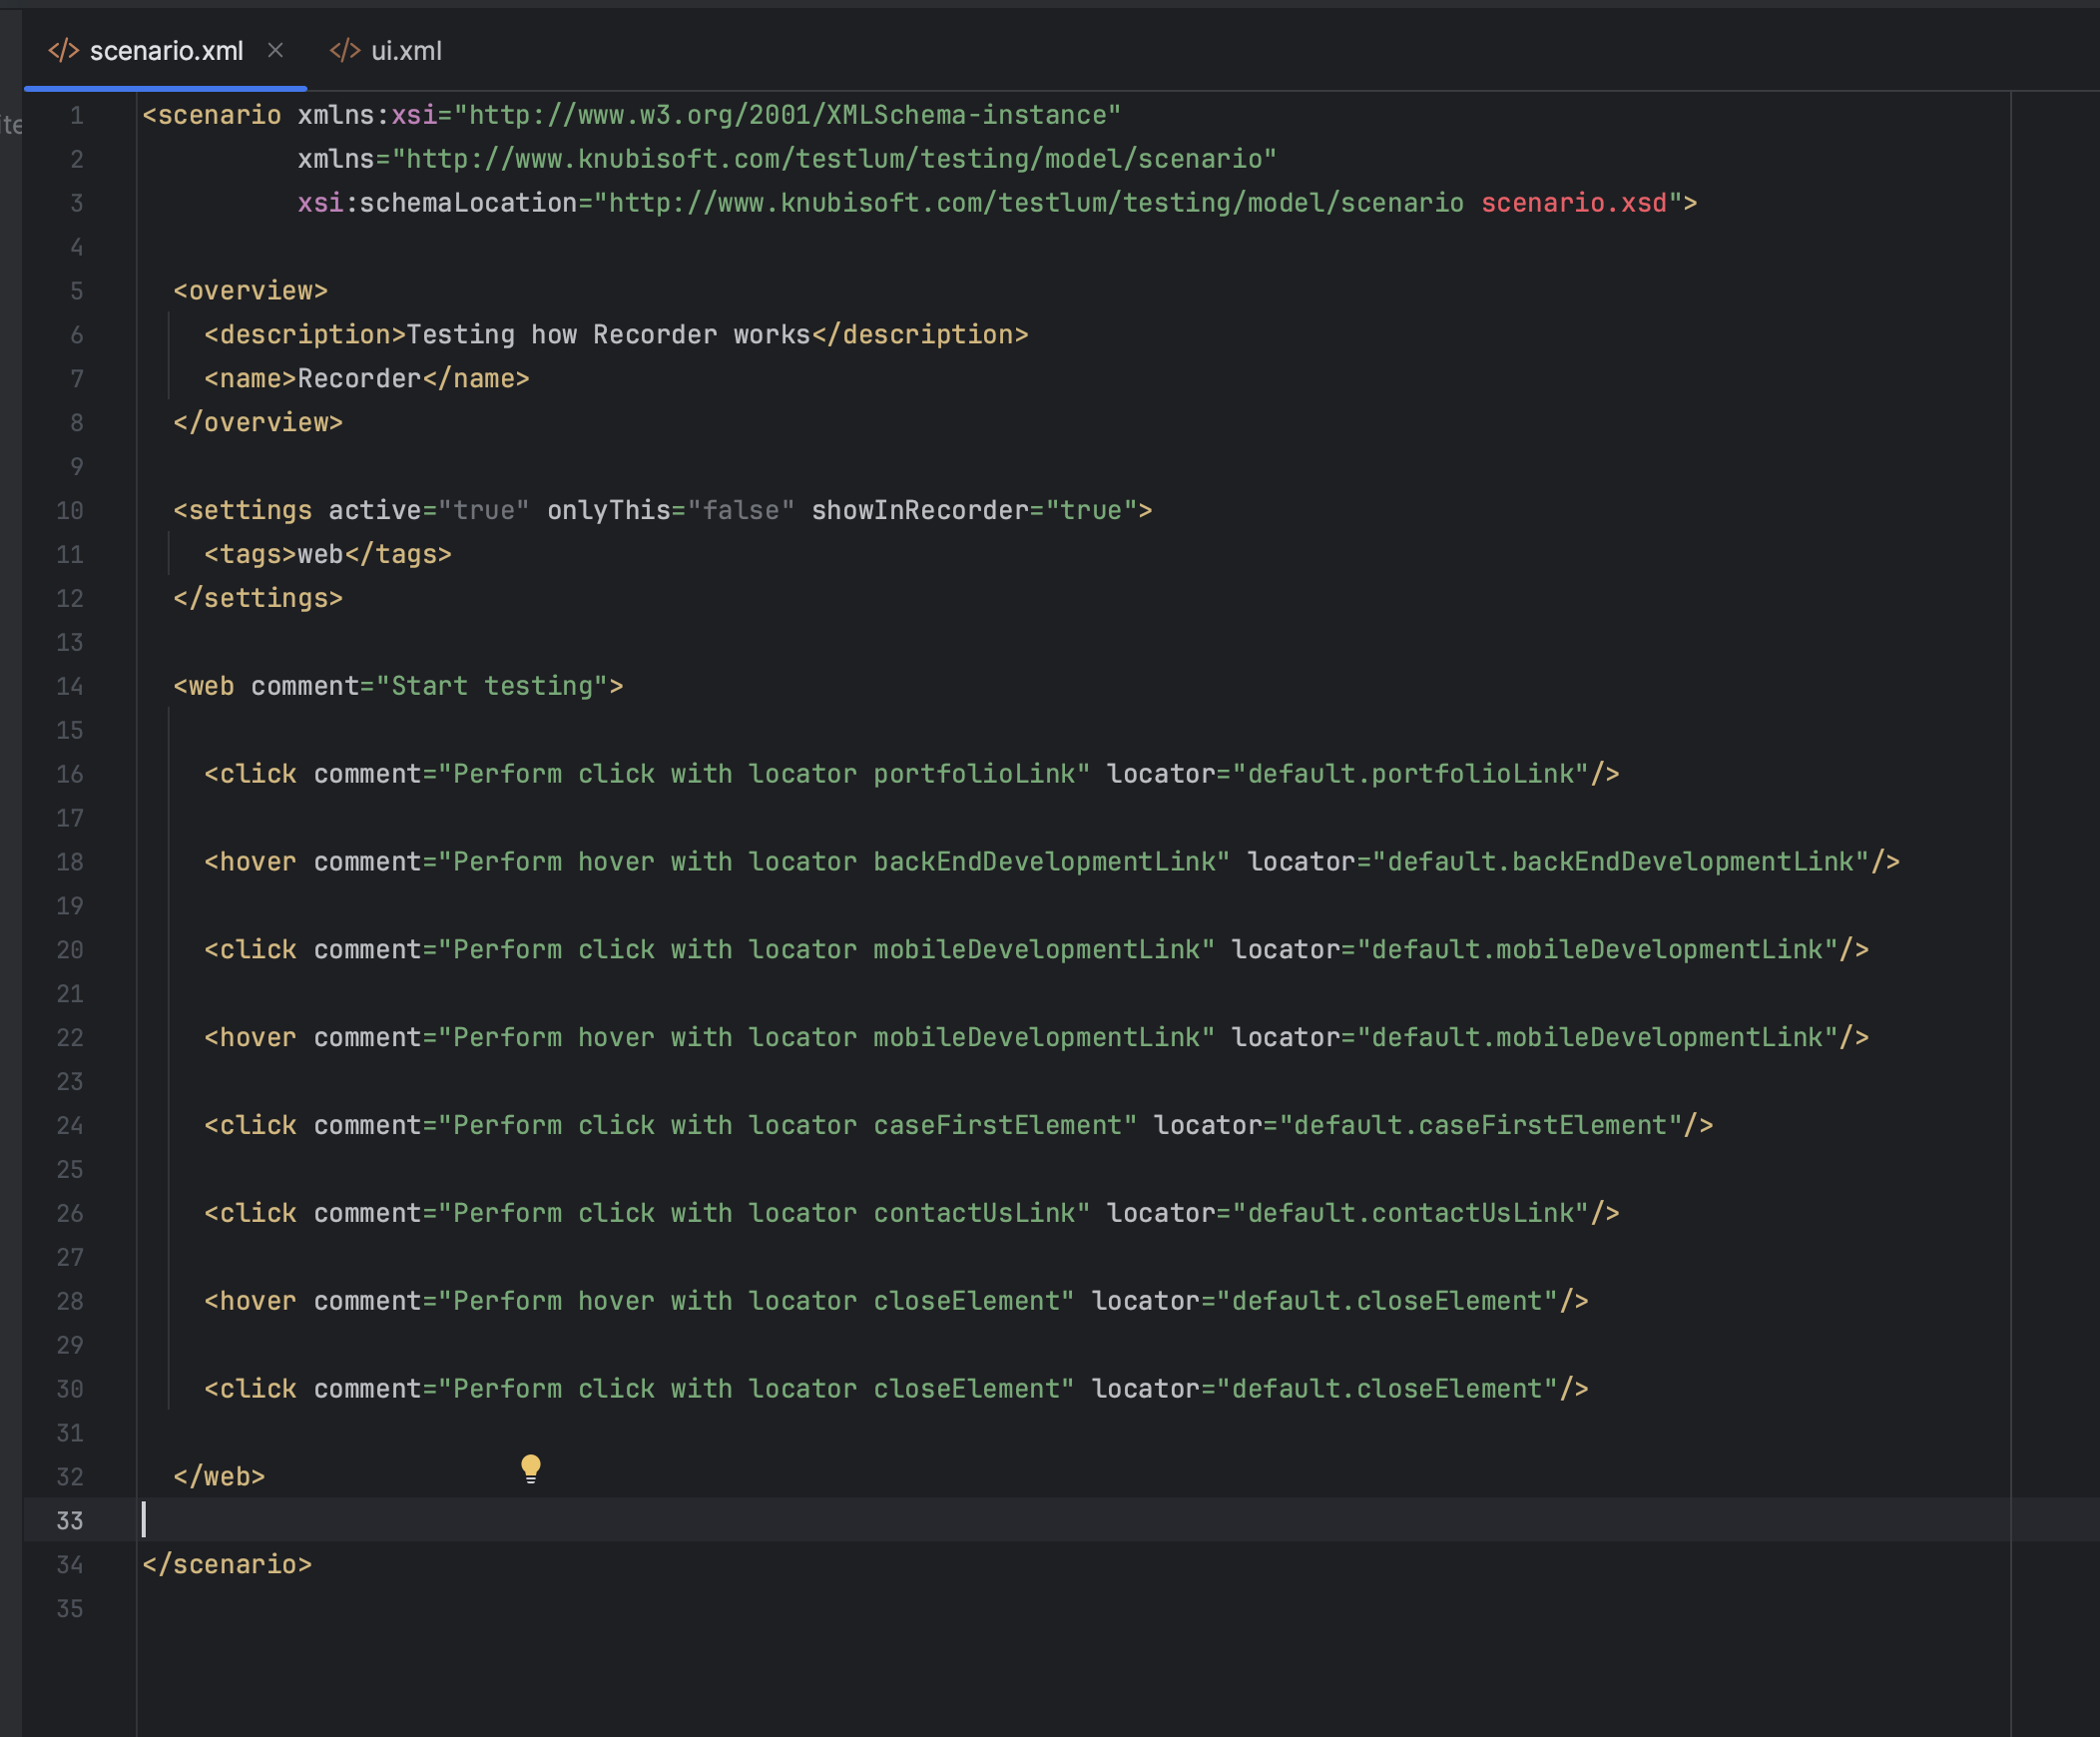
- Create a new directory in the ‘scenarios’ folder and add to it a new scenario.
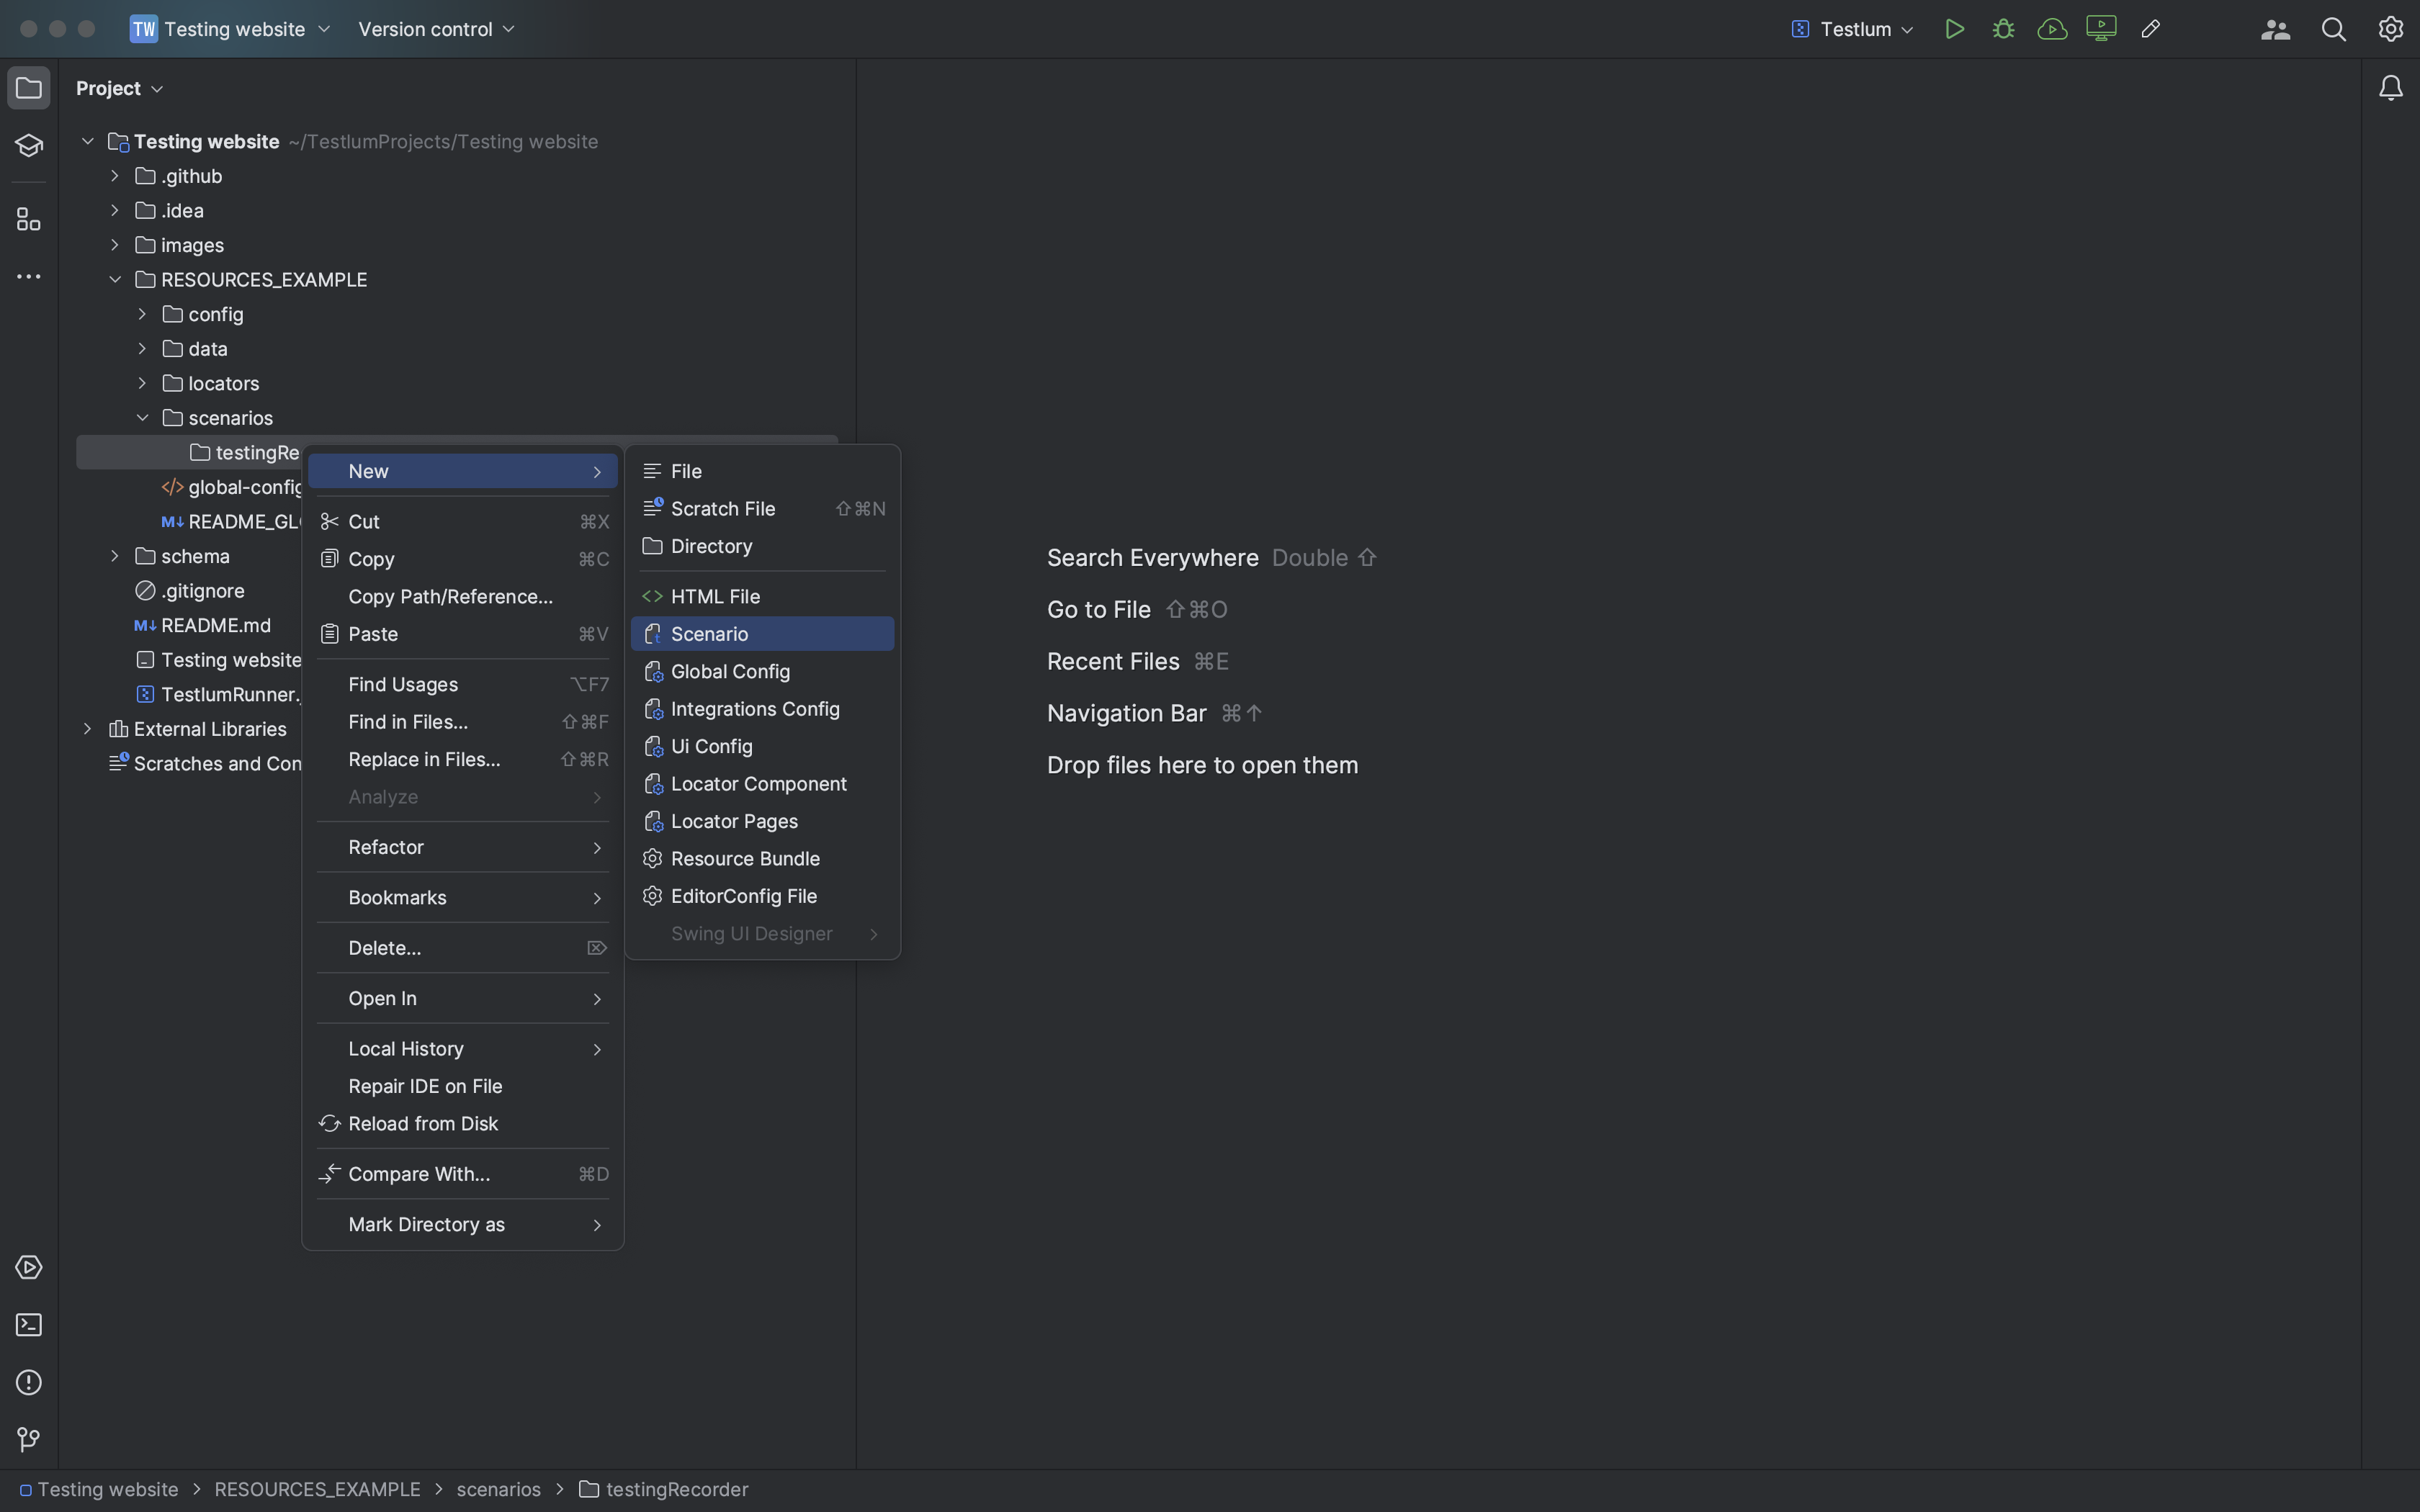
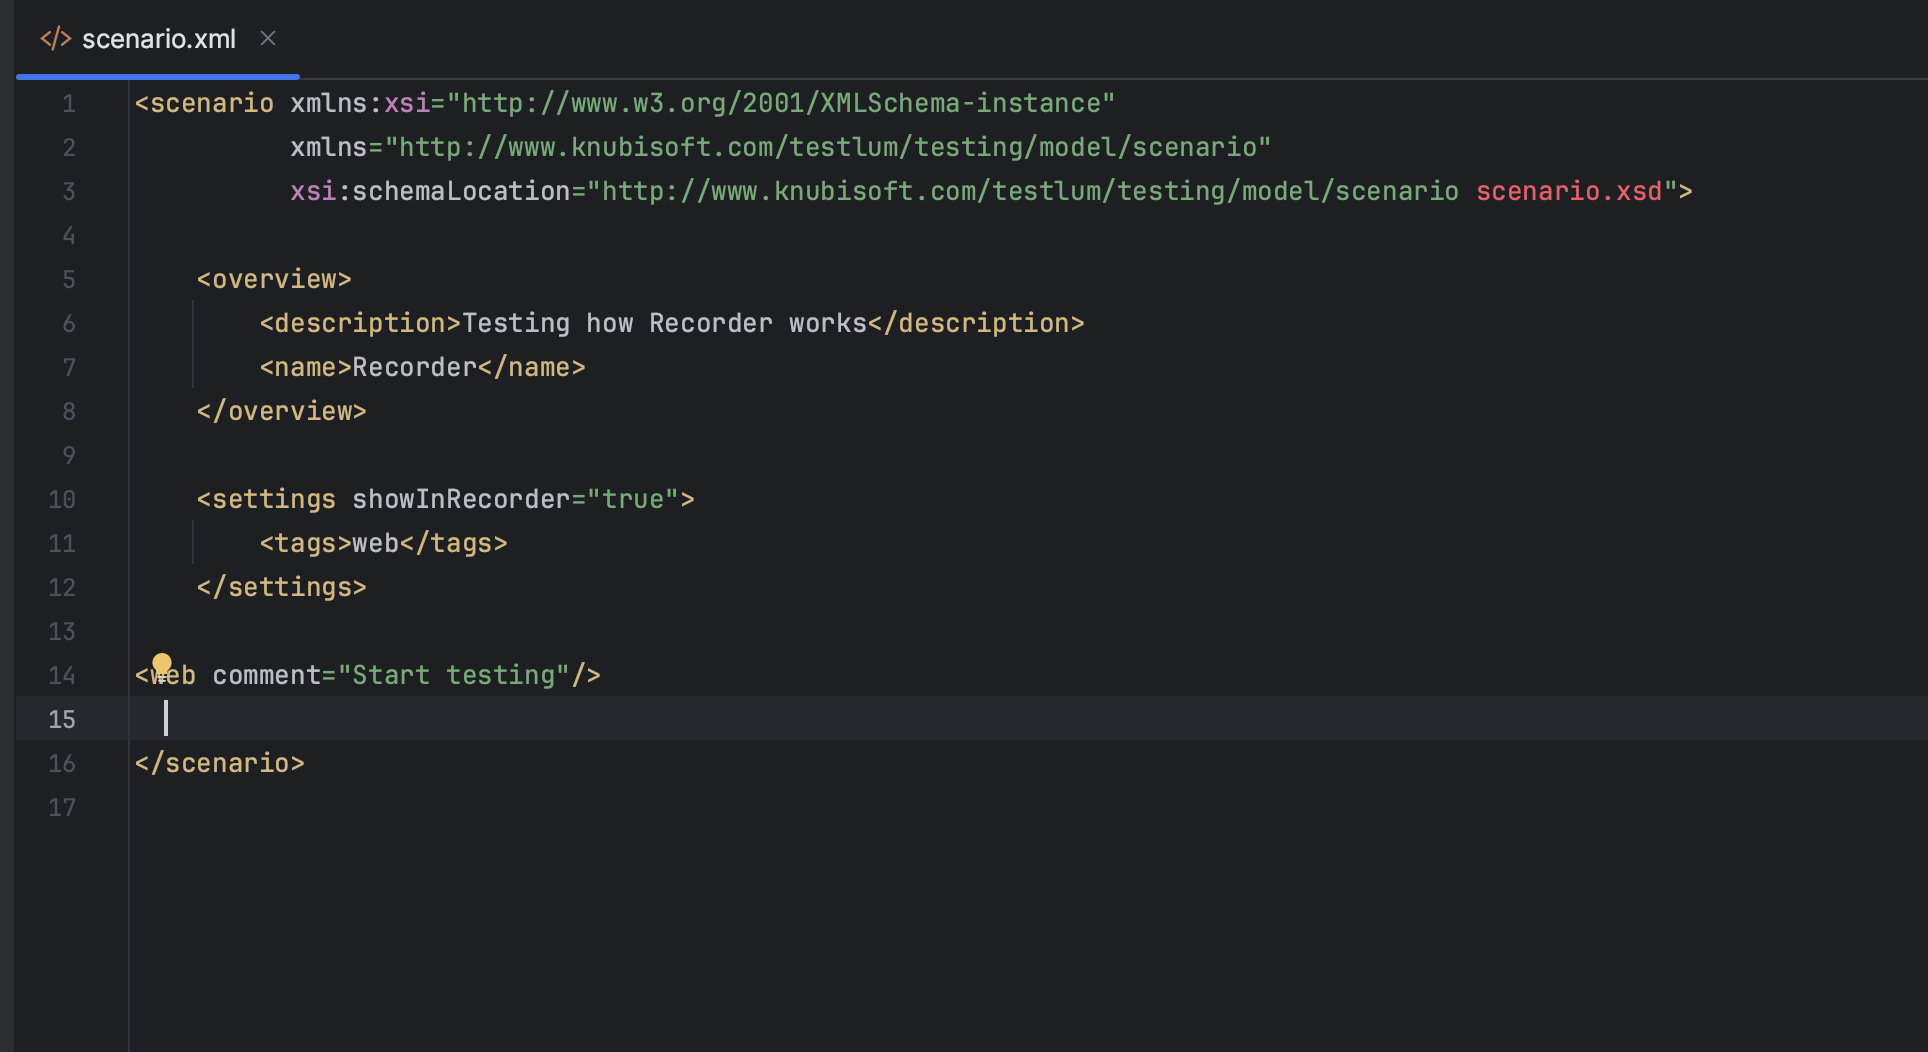
- Enter a description (min 10 symbols) and the name of the new scenario. In Settings turn on the flag 'showInRecorder'="true" and specify the tag ‘web’. Create a ‘web’ tag.
Note: all the scenarios with the 'showInRecorder'="true" flag created in IDE are displayed in the ‘Select Test’ column of the Recorder after opening it.
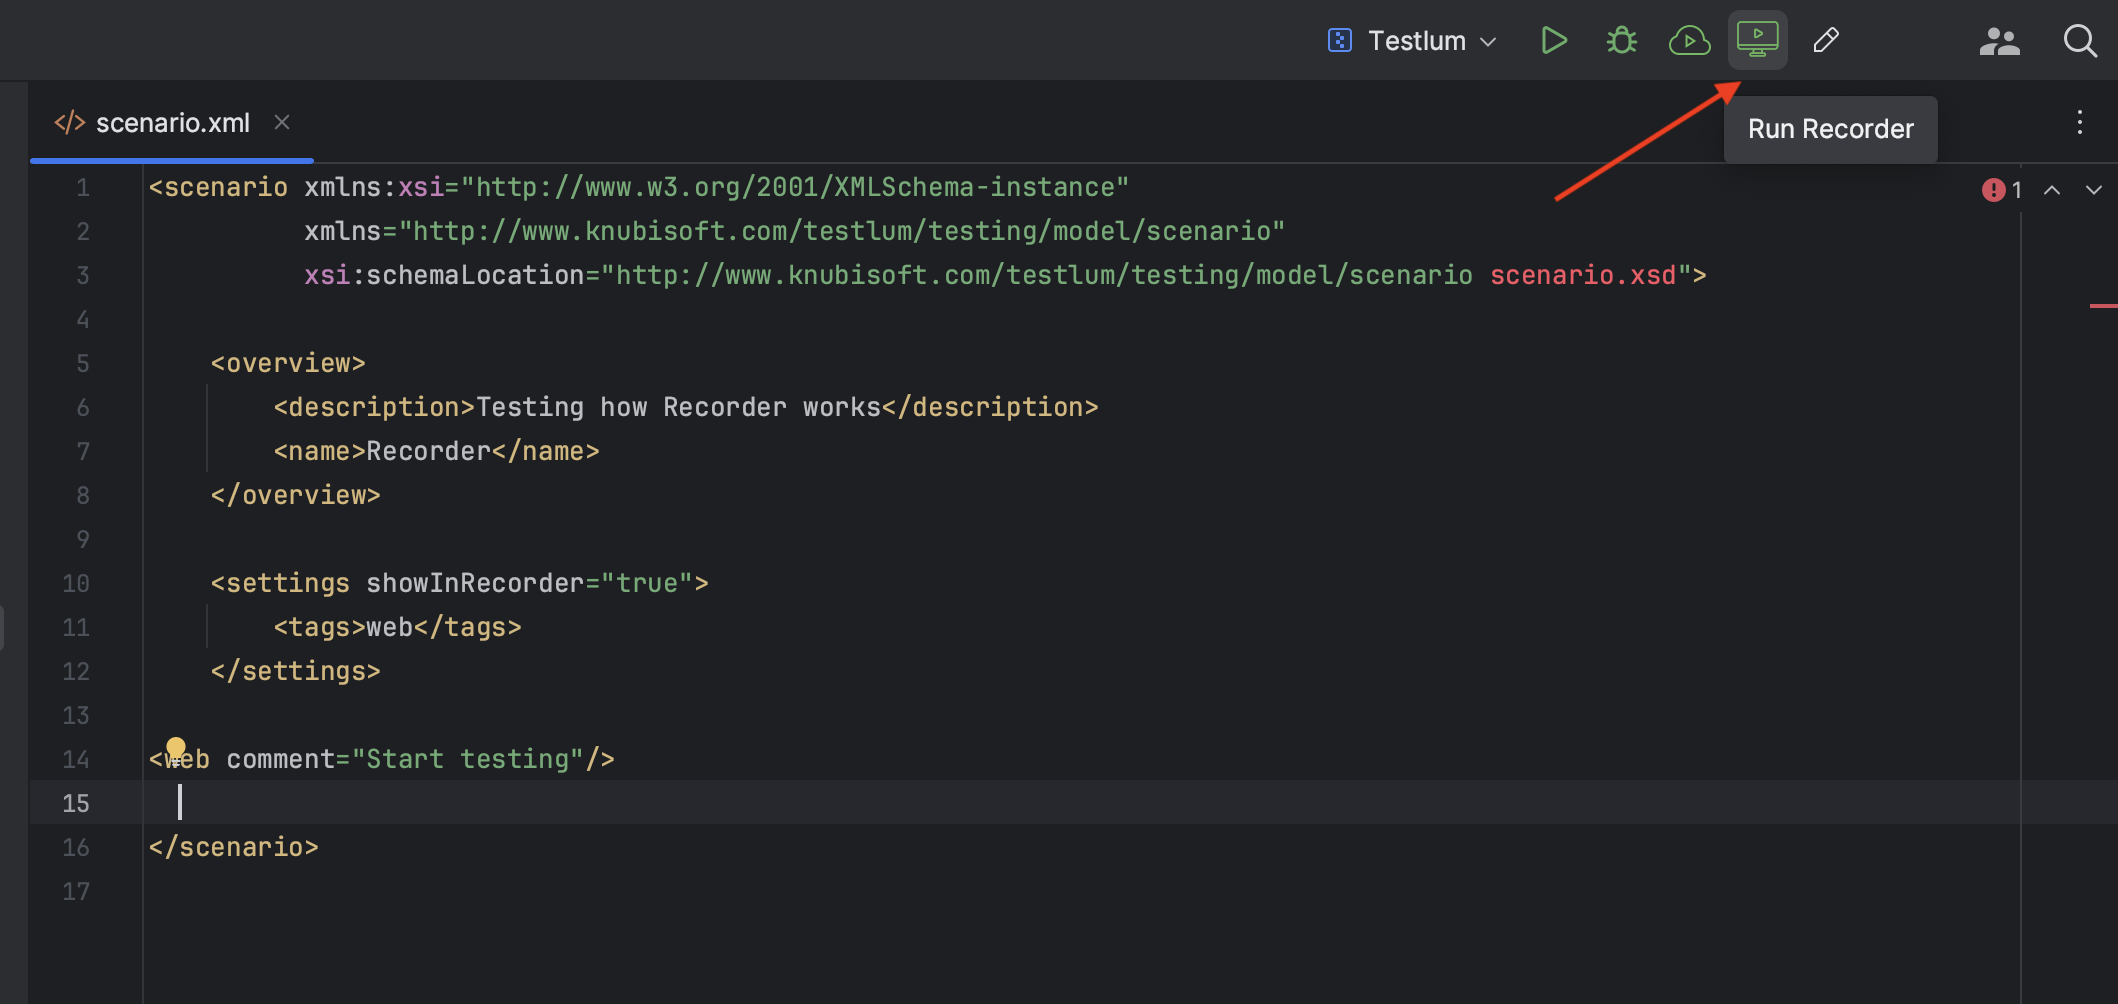
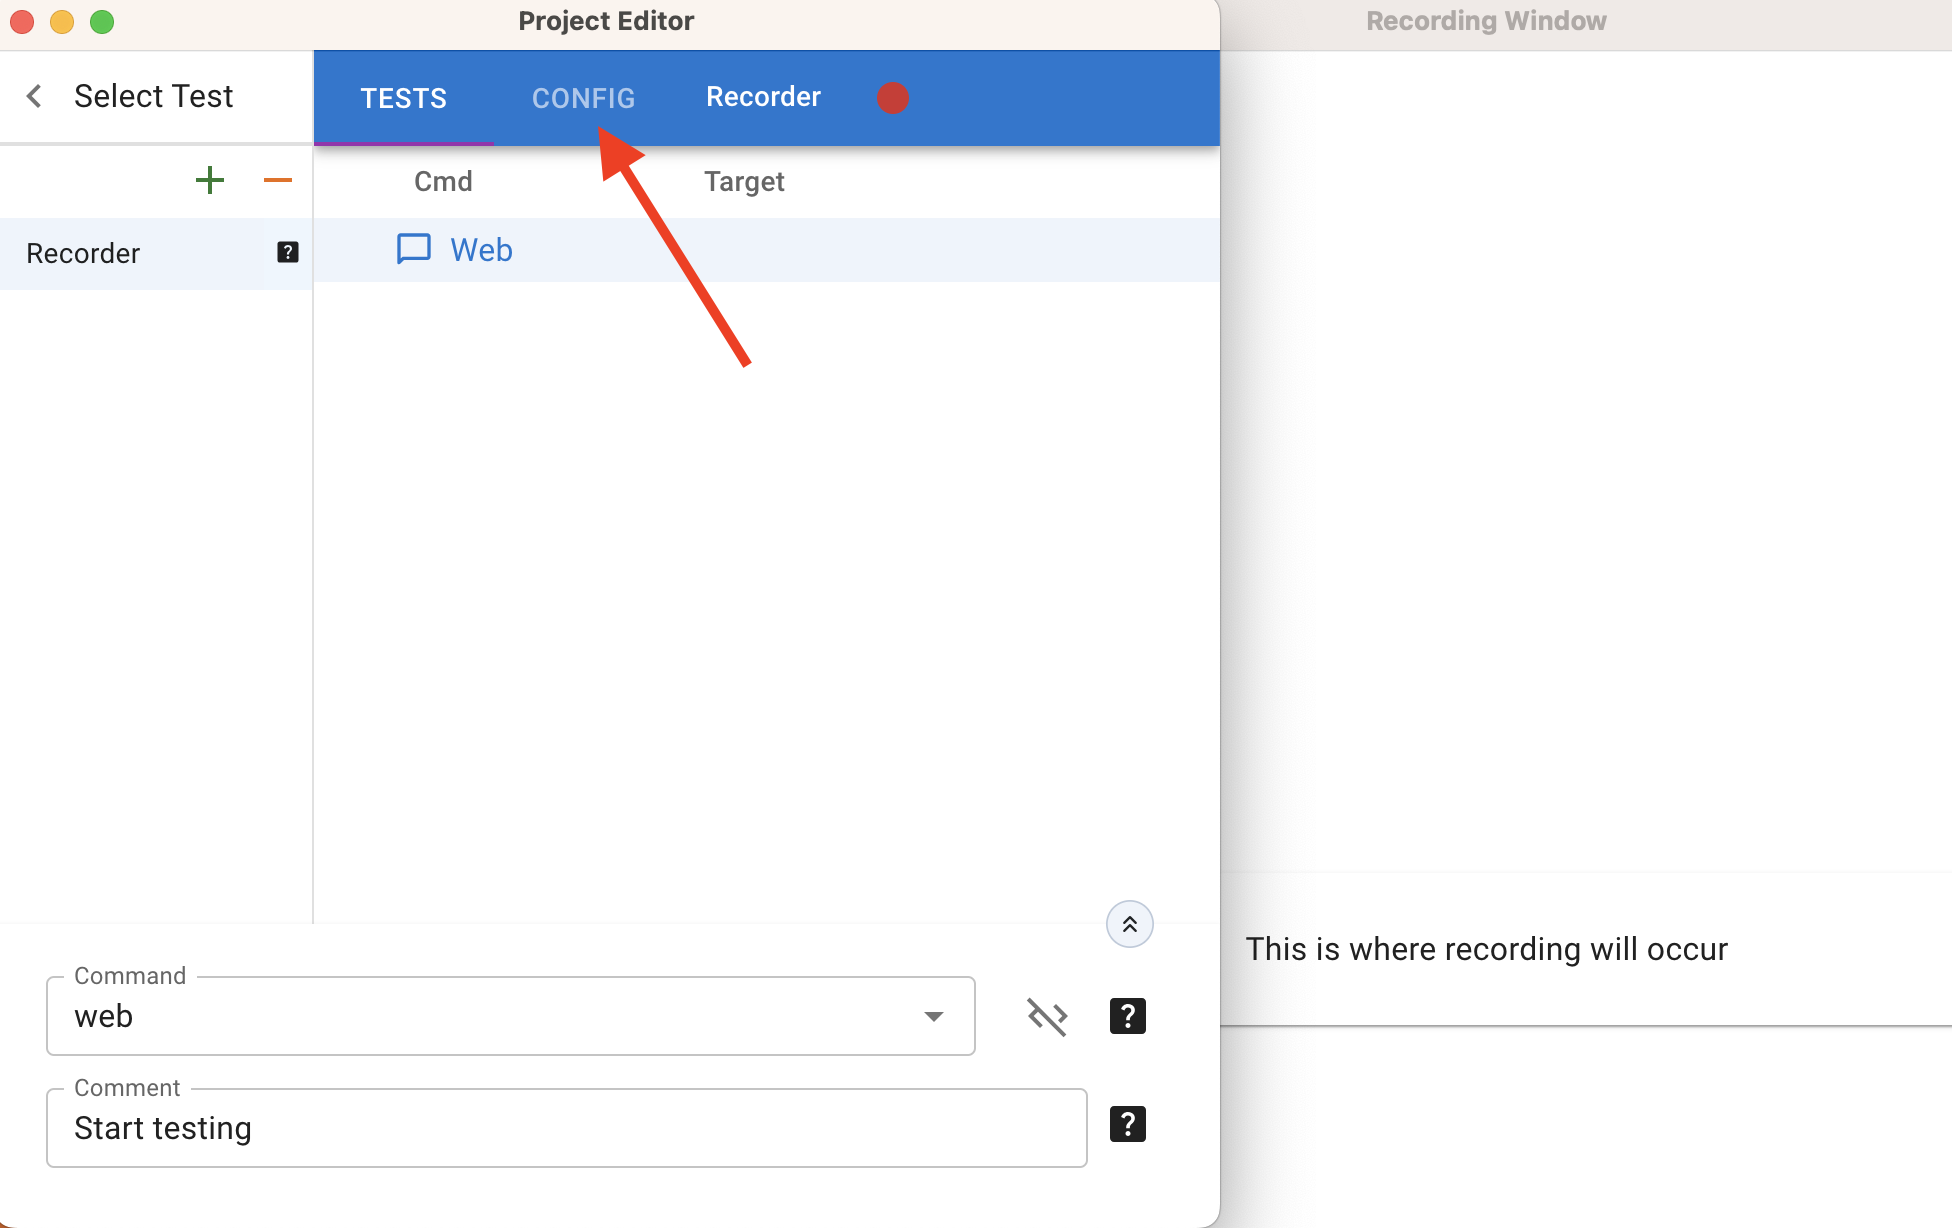
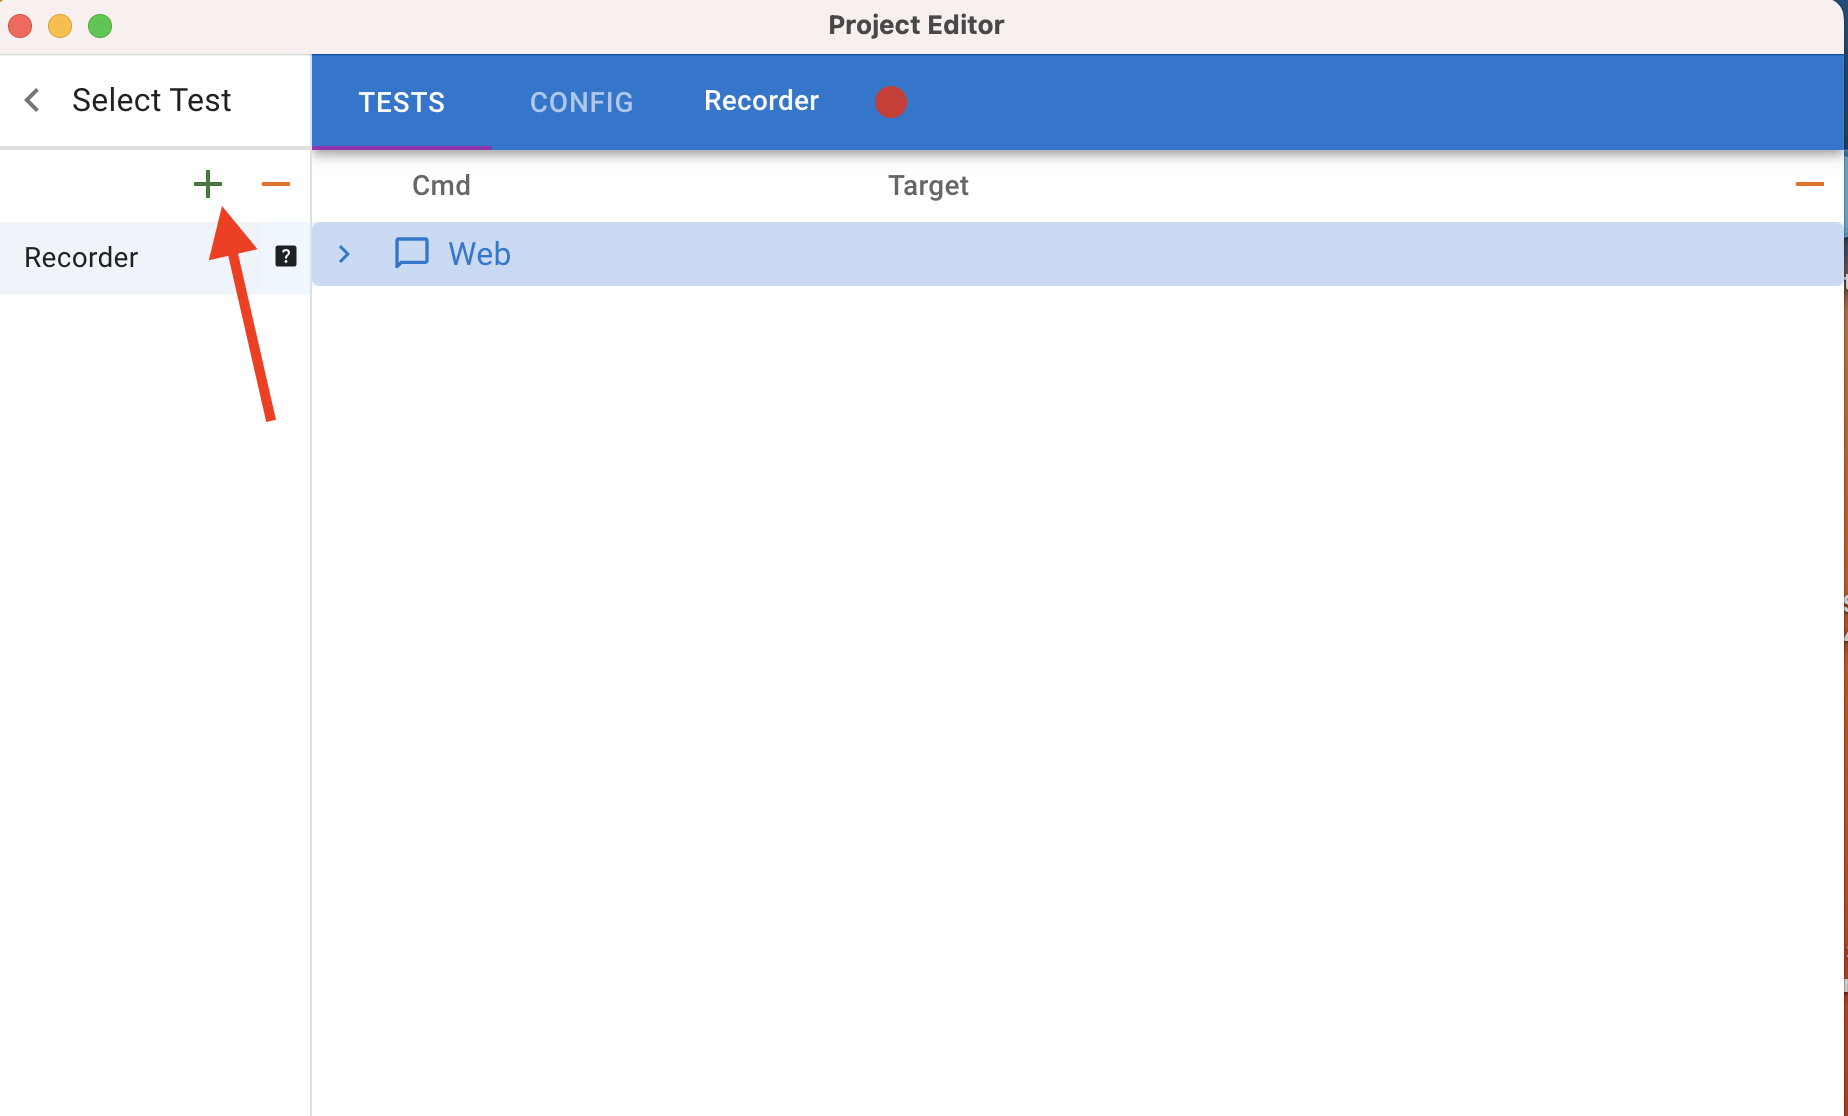
- Click the ‘Run Recorder’ button. The Project Editor and Recording window will be opened.
- Select the name of the scenario which you want to record. You can check the ‘base URL’ in the 'Config' tab. (The URL in the ‘Config’ tab of the Recorder is the same as the ‘base URL’ in the ‘ui.xml’ file in the IDE. When the URL is changed in ‘ui.xml’ during the working of the Recorder, changes are not displayed in the 'Config' tab of the Recorder until the Recorder is closed and reopened).
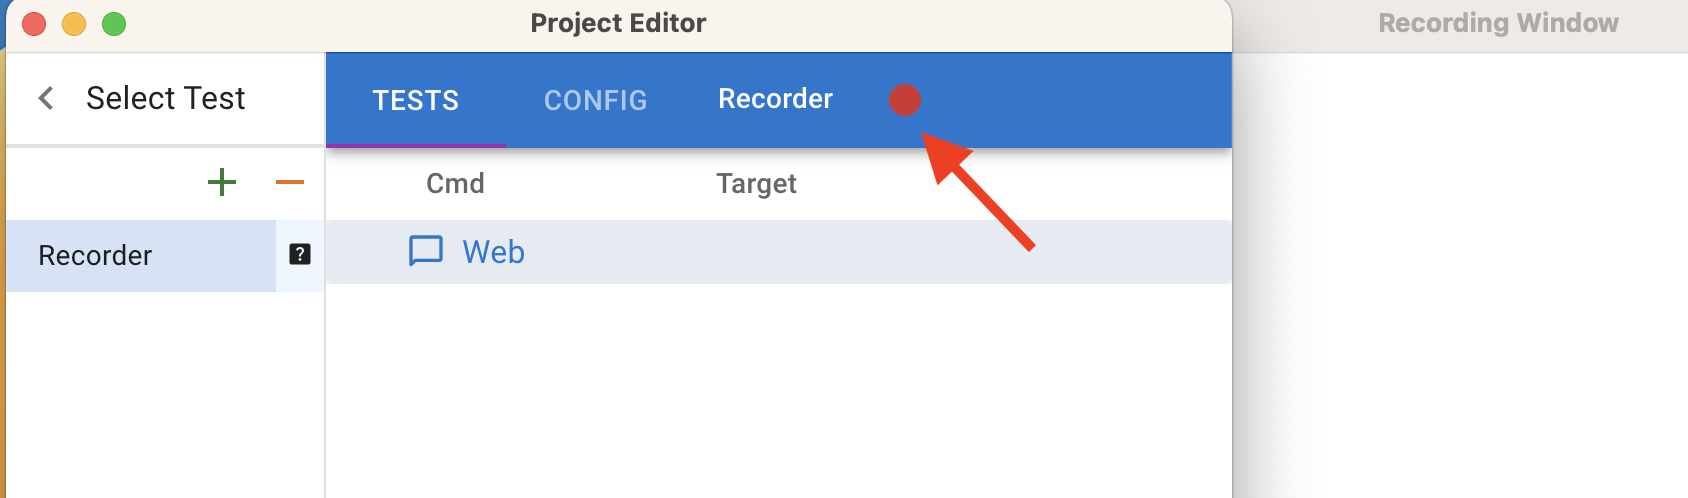
- To start recording click the 'Record' button. The ‘base URL’ will be opened in the Recording window.
- Make some actions in the Recording window.
- To stop recording click the ‘Stop’ button.
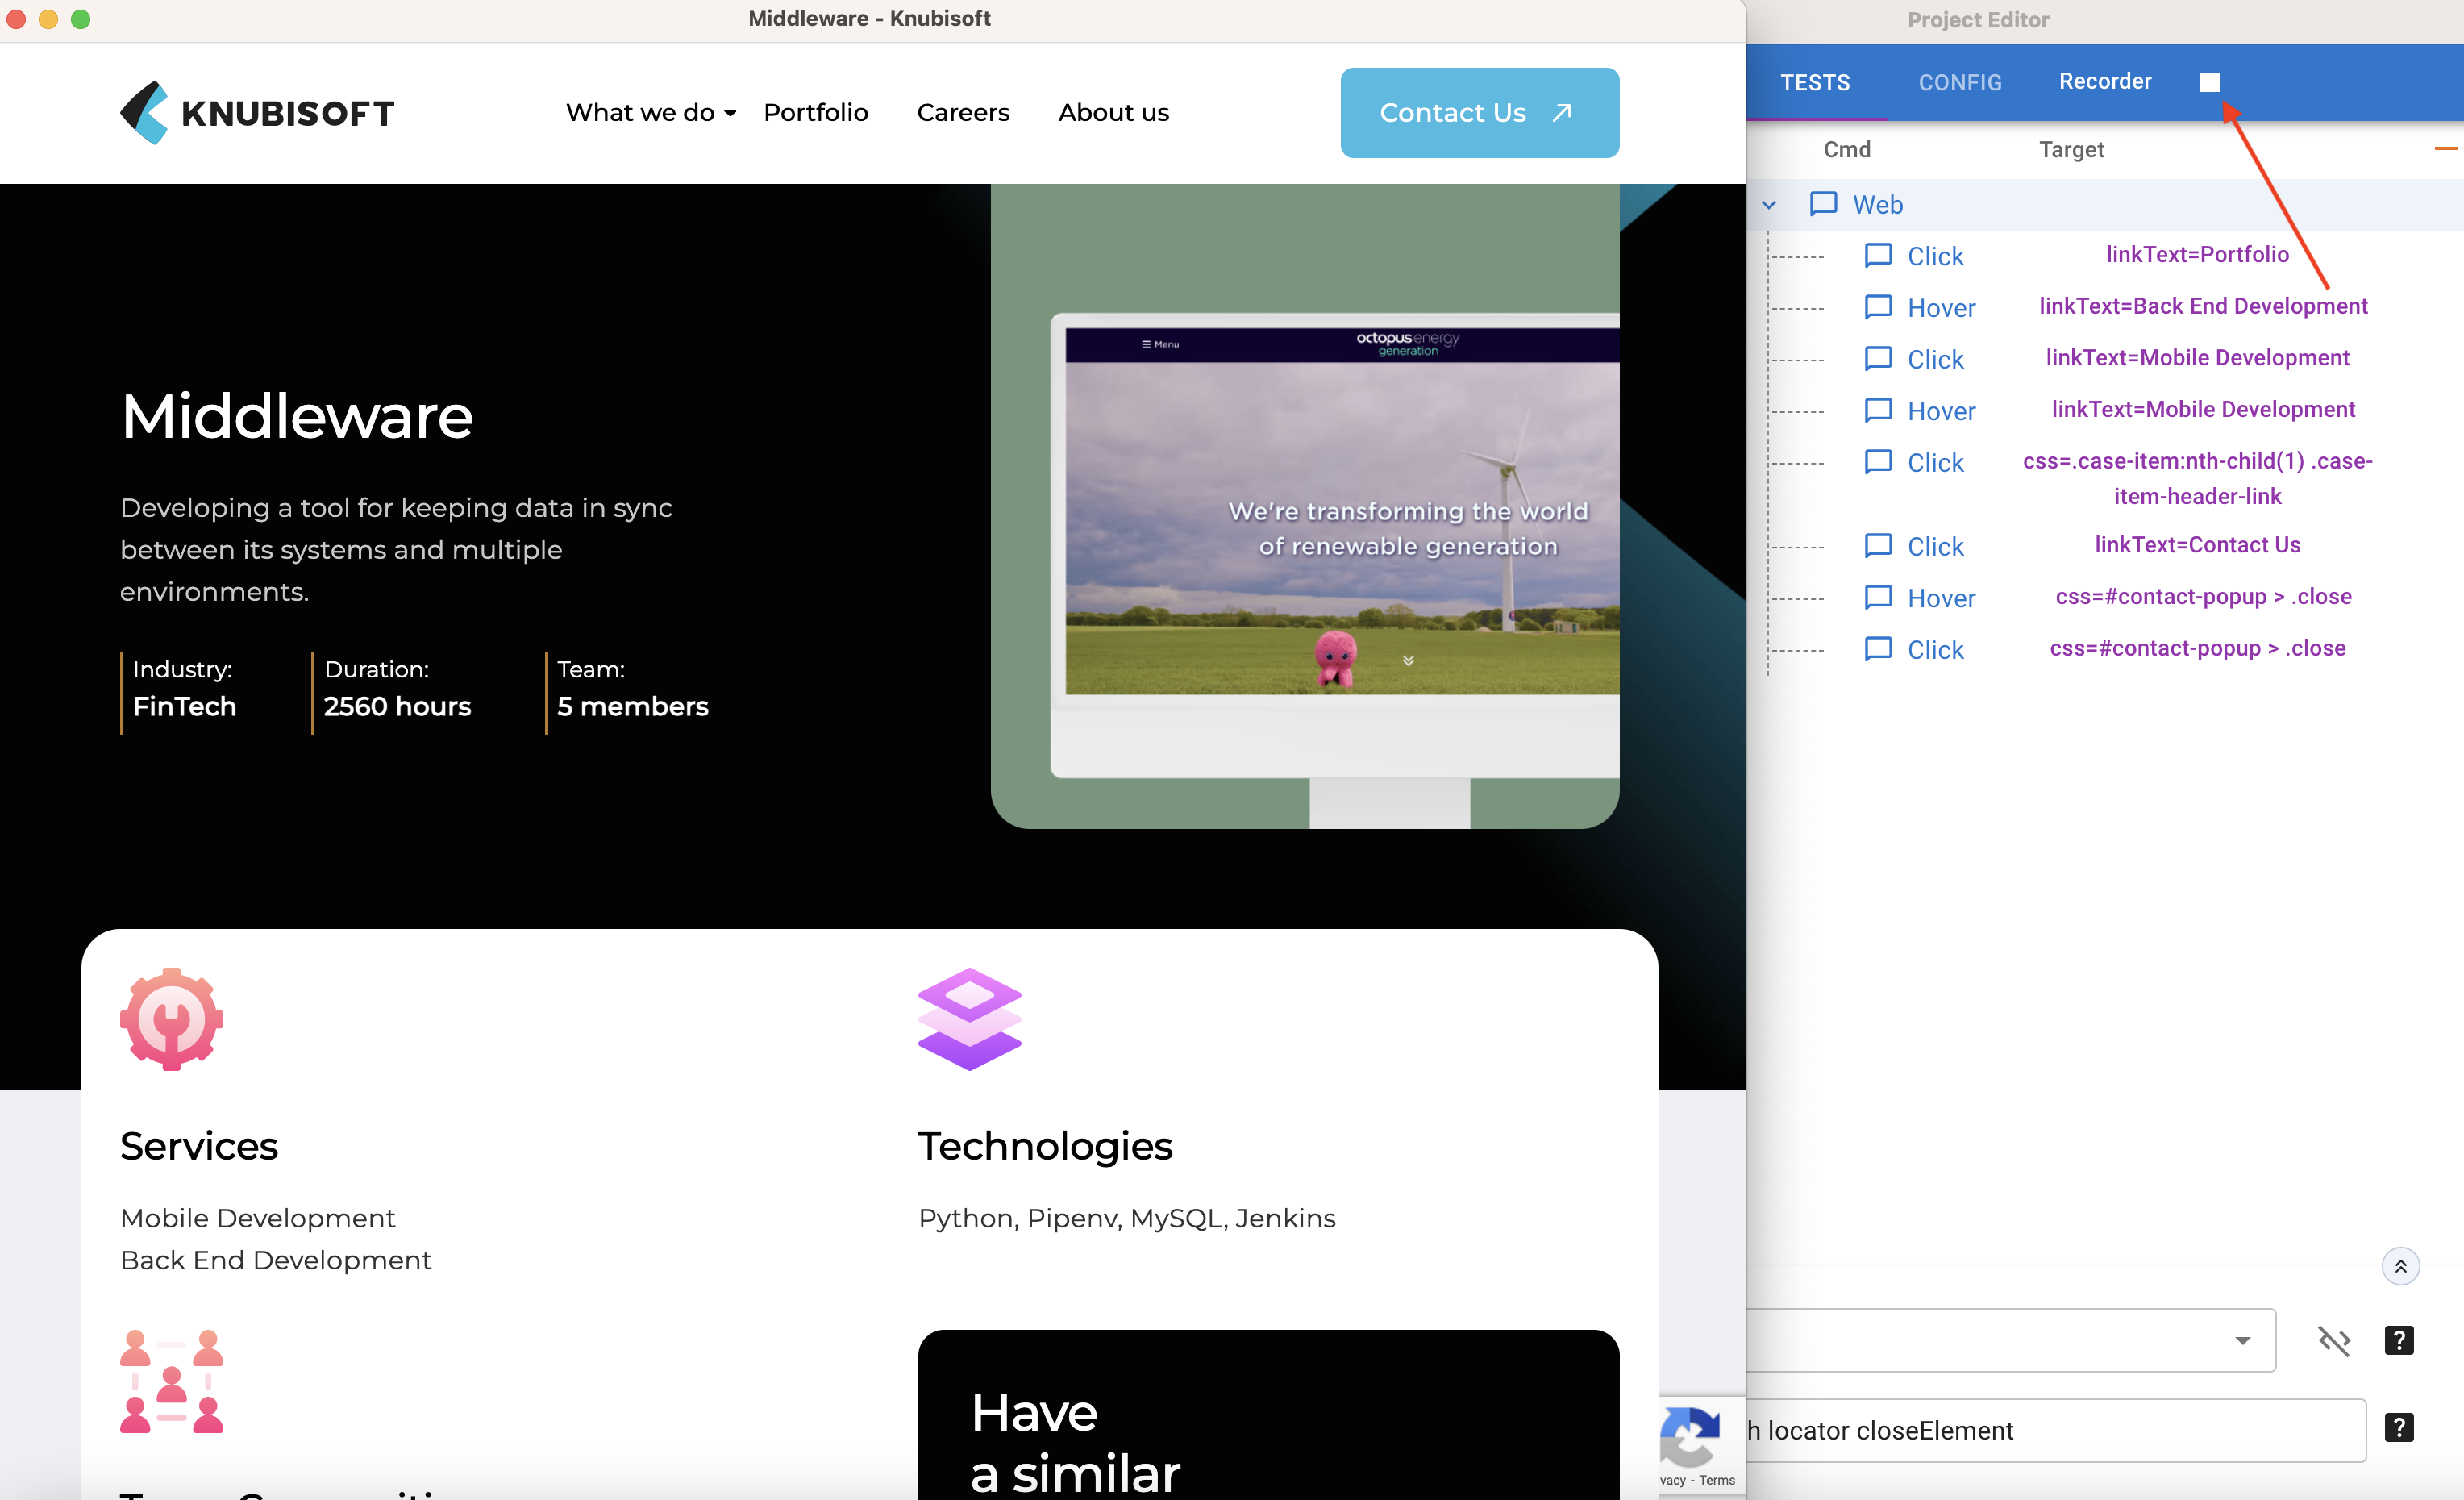
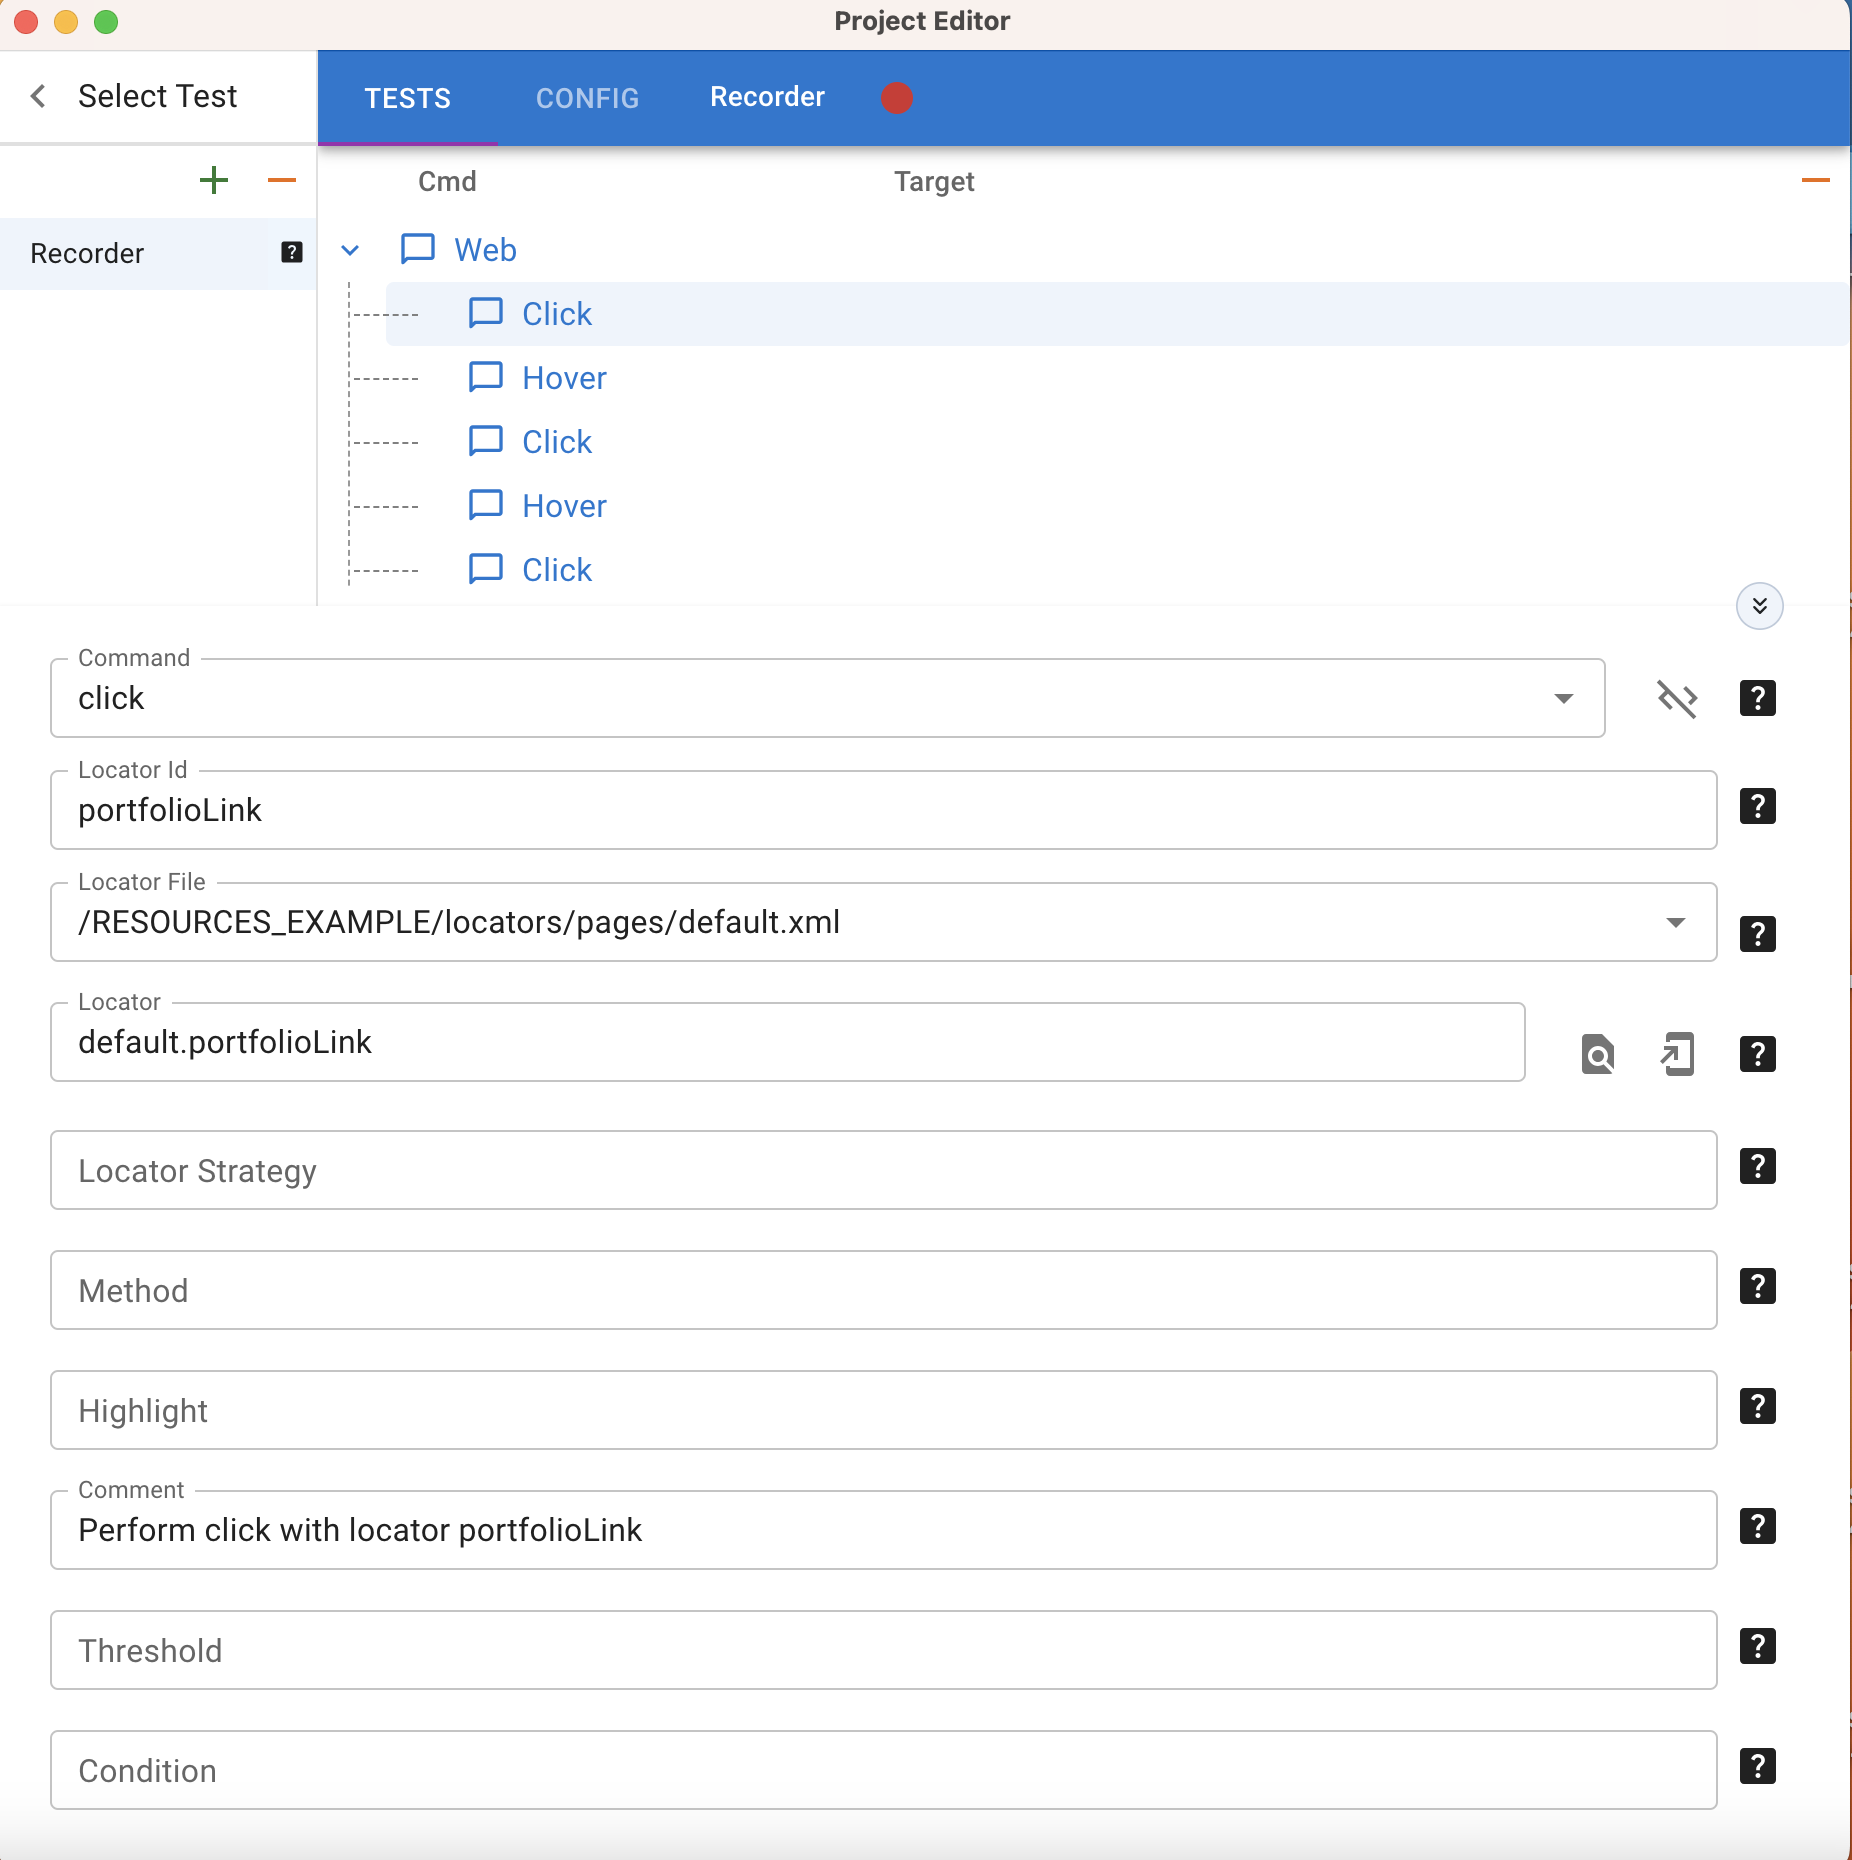
- You could see every recorded command details in the scenario created in the Recorder. All the required attributes (comment, locator, LocatorId, etc.) are generated automatically by the Recorder. You can change it by yourself. All changes made in the Recorder are displayed in the Testlum IDE and vice versa.
- To run, edit, or delete scenarios, and to work with recorded locators, go to the IDE. All changes made in the scenarios are being synchronized between the IDE and the Recorder.
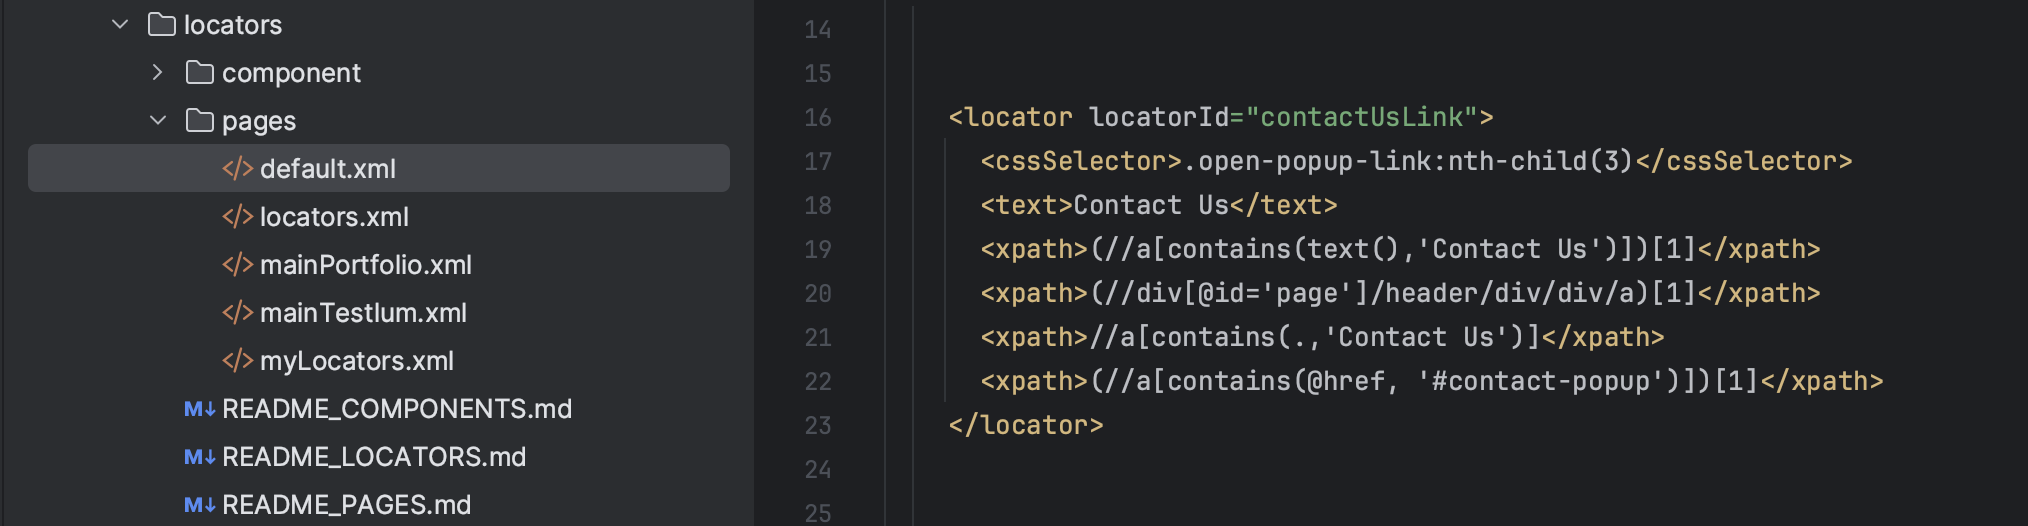
All locators generated automatically by the Recorder are stored in the default.xml file in the locators folder.
Creating a new scenario in the Recorder
It’s also possible to create a new scenario inside the Recorder.
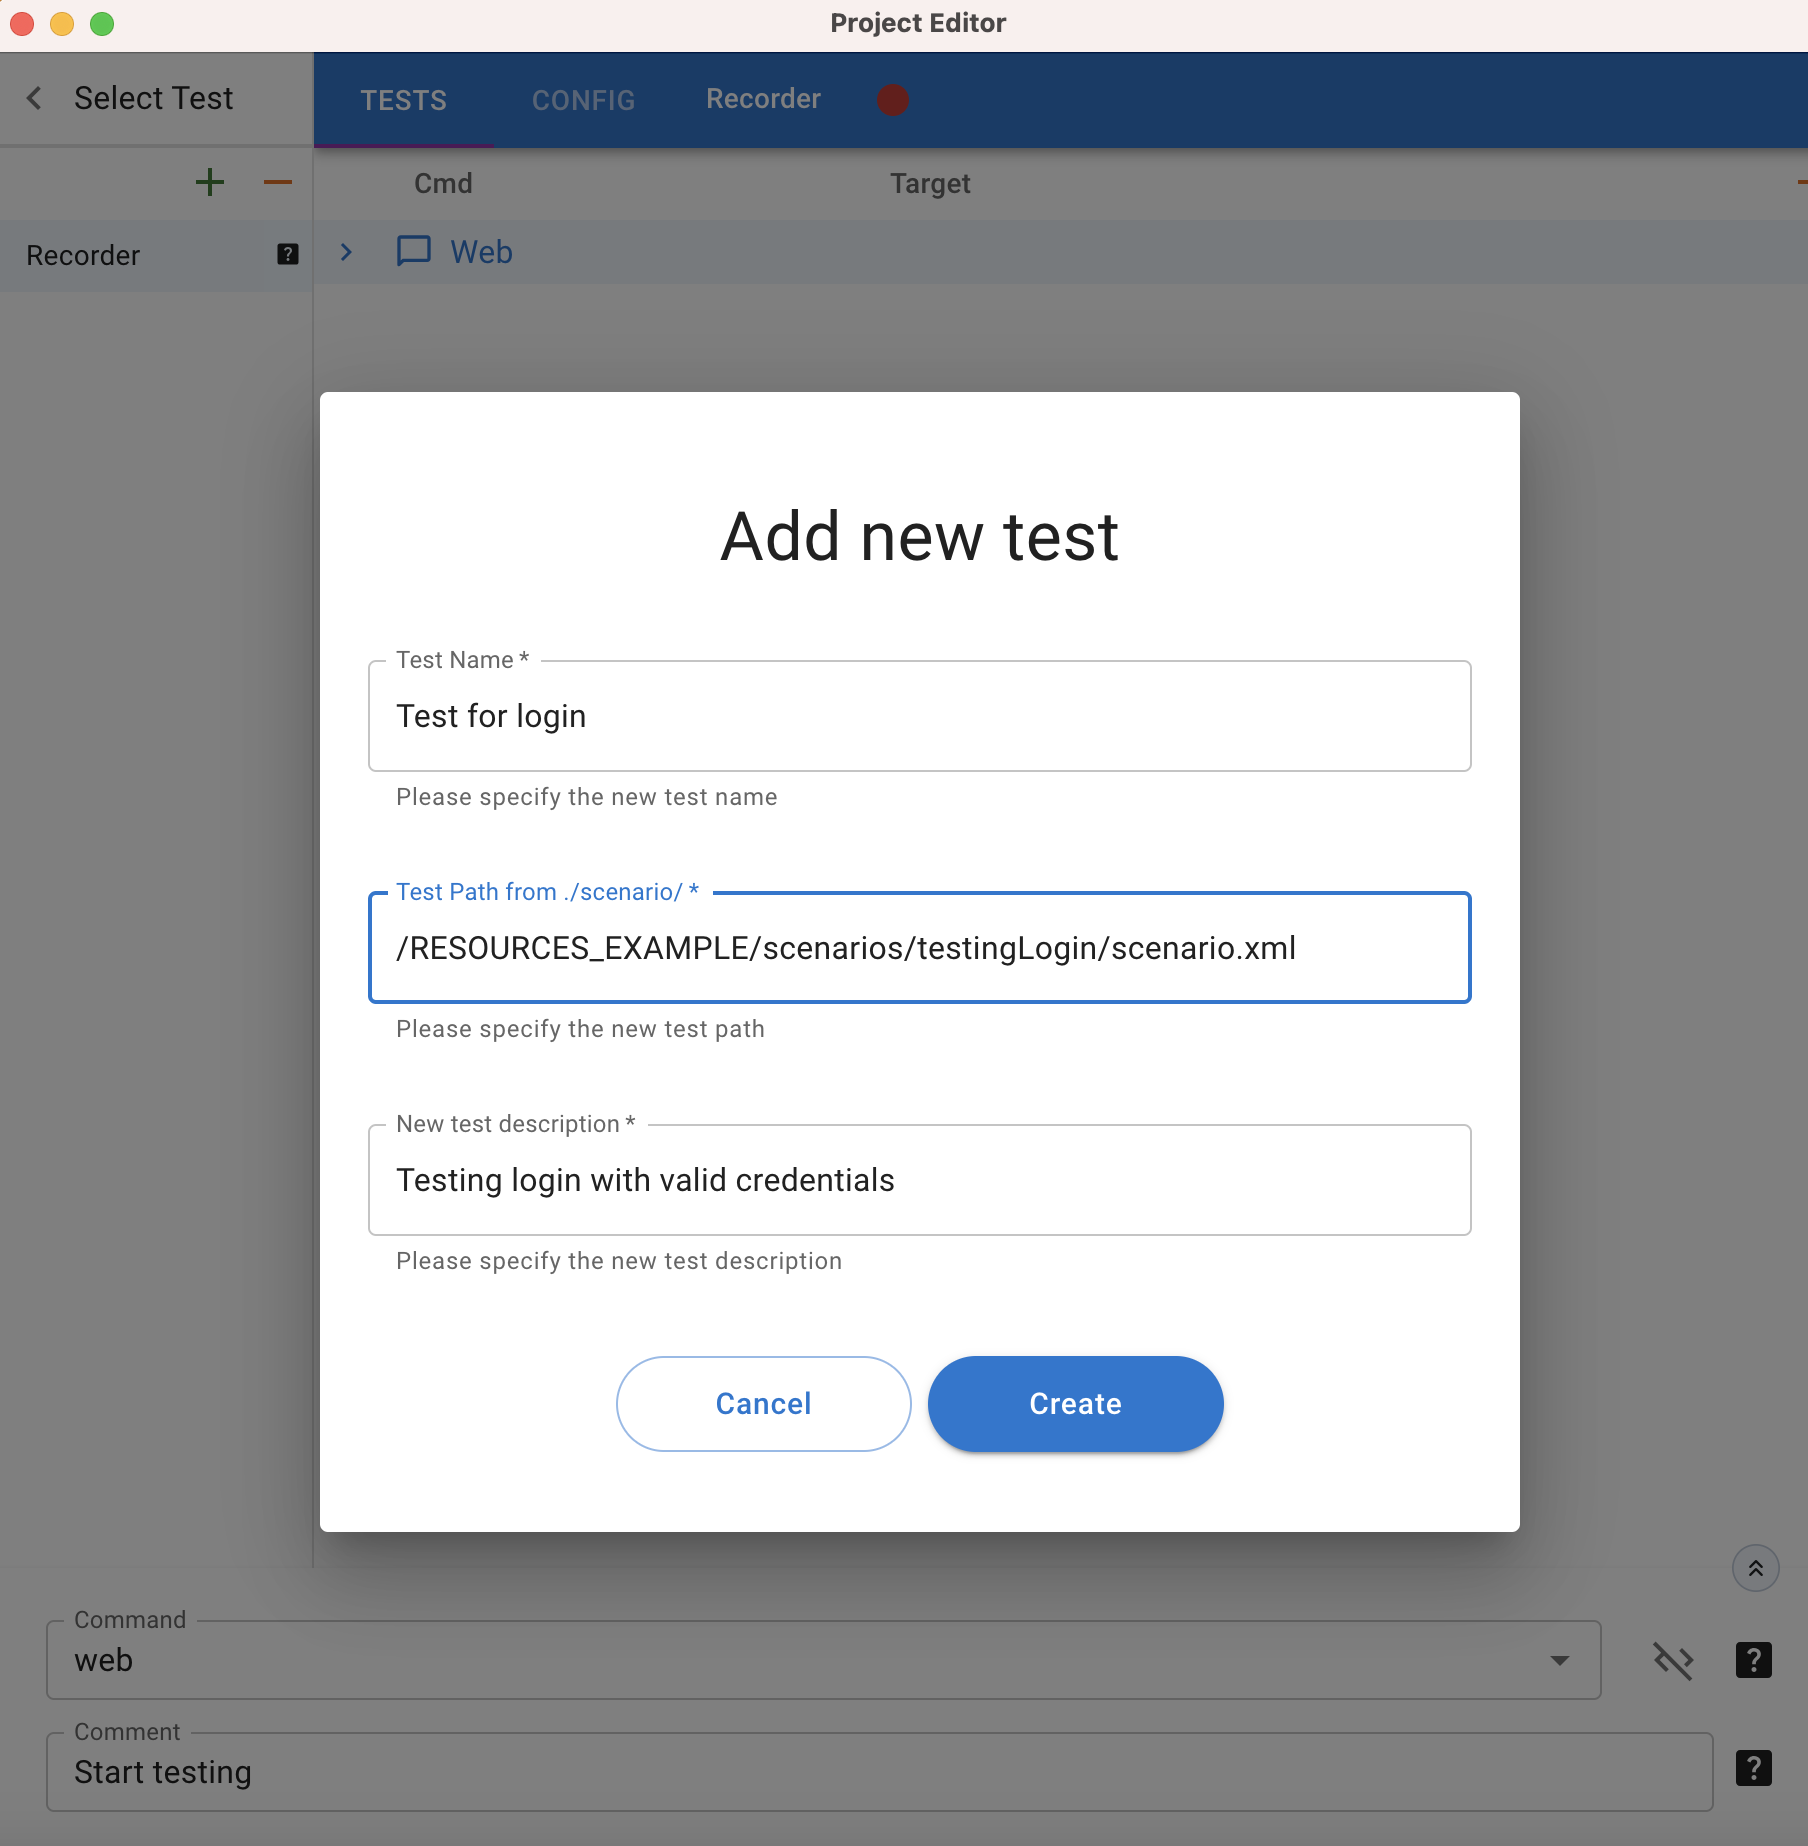
- Click the “Add” button in the top left corner.
- Enter 'Test Name', 'Test Path' (specify the folder where the scenario will be added in IDE), and 'New Test Description'.
Deleting the scenario
- Deleting a scenario in the Recorder is possible by clicking on the “-” button and confirming removal. The scenario is removed from the Recorder and in the IDE it gets the status ‘showInRecorder’="false".
- After deleting the scenario with a flag ‘ShowInRecorder’="true" in IDE this scenario is deleted in IDE and Recorder.
It's possible to resize the window during the recording. But it’s recommended to synchronize the size of the Recorder's window with configurations of the browser in the 'ui.xml' (make the maximum size of the Browser window during the recording and in configuration to set up 'maximizedBrowserWindow'="true"). If it differs from the size of the window (is smaller) in which the test will run, the test may fail, because elements on a page of a different size may be arranged differently ("sandwich" menu, horizontal scrolling, etc.).